
Enable effortless and serverless App streaming using Amazon AppStream 2.0 Elastic Fleets
- Hendrik Hagen
- Aws
- April 3, 2025
Table of Contents
Introduction
As remote work continues to redefine the modern workplace and SaaS applications become the backbone of businesses worldwide, delivering applications to end-users quickly, globally, and cost-effectively has become a top priority. No longer confined to on-premises environments, applications must now be accessible from anywhere in the world, all while meeting stringent requirements for speed, efficiency, and cost-effectiveness.
To navigate these challenges, application streaming has emerged as a transformative solution. This technology allows users to remotely access and utilize applications without the need for local installations. Hosted on a central server or cloud infrastructure, only the application’s interface is streamed to the device, creating the illusion that the application is running natively. Users can access these applications from any device, anywhere, with the assurance that data and processing power remain secure and centralized. Additionally, application streaming simplifies software management by centralizing updates and maintenance, ensuring users always have the latest version without the hassle of individual installations.
One service that enables businesses and ISVs to adopt application streaming is Amazon AppStream 2.0. A fully managed solution, AppStream 2.0 allows users to access desktop applications instantly, from any location. The service efficiently manages the AWS resources required to host and run applications, scales automatically, and delivers seamless access to users on-demand. Unlike traditional on-premises desktop application streaming solutions, AppStream 2.0 offers pay-as-you-go pricing, eliminating the need for upfront investments or maintaining infrastructure. You can scale globally and instantly, ensuring that users always experience the best possible performance.
In this blog post, we’ll explore how Amazon AppStream 2.0 can help you efficiently and securely stream applications to your users, unlocking new possibilities for your business in today’s fast-paced digital landscape.
Overall Architecture
Let’s begin by reviewing the architecture that will be deployed in this example. The high-level diagram below provides an overview of the key components involved. Our goal is to set up an AppStream 2.0 Elastic Fleet to stream the database management tool, DBeaver, to end users. This will allow them to manage an RDS MySQL database within a customer’s account. This setup is simply an example to demonstrate the functionality and potential of Amazon AppStream 2.0 Elastic Fleets.

The architecture consists of two main components. First, there is the customer VPC, which resides within the customer’s account. This VPC hosts the infrastructure that the AppStream application will interact with. In this example, we’ll be streaming the DBeaver application to manage an RDS MySQL database located within the customer’s VPC. Additionally, we’ll create an S3 bucket to store the VHD file and setup scripts required to deploy the AppStream application for Elastic Fleets.
The second component is the Amazon AppStream infrastructure, which will leverage Elastic Fleets. Elastic Fleets are a serverless fleet type that stream applications from an AWS-managed pool of streaming instances. This removes the need for administrators to predict usage, configure scaling policies, or manage images. Elastic Fleets are ideal for use cases with variable demand, such as software trials, training, sales demos, or converting desktop applications to a SaaS delivery model.
Applications in Elastic Fleets are stored as Virtual Hard Disks (VHD) in an S3 bucket. When a user launches an application, a new streaming instance is created, the VHD is downloaded, and the application is streamed to the user. This eliminates the need for manual scaling or image management, as AppStream 2.0 automatically handles the streaming instance pool.
In this scenario, we will launch an Image Builder instance to create the DBeaver VHD, which will then be uploaded to the S3 bucket. Next, we’ll configure an Elastic Fleet based on this DBeaver VHD. Users will then be able to connect to the Elastic Fleet and use the DBeaver application to manage the RDS database within the customer’s VPC via AppStream.
Walkthrough
Step 1: Deploy Base Infrastructure
We’ll begin by deploying the base infrastructure using Terraform. The complete code for this walkthrough is available on GitHub. You can either clone the repository or manually copy the code to your local machine. Inside the provided directory, you’ll find multiple Terraform configuration files that define the required infrastructure.
Before deploying, a few Terraform variables need to be updated. Open the terraform.tfvars file, where you’ll find the following parameters:
user_email_address    = "xxxxxxxxxx"
user_first_name       = "xxxxxxxxxx"
user_last_name        = "xxxxxxxxxx"

application_name      = "appstream-db-manager"
password_database     = "supersecretpassword"
username_database     = "admin"
initial_database_name = "bookstoredb"
appstream_fleet_name  = "dbeaver"

vpc_cidr_block = "172.16.0.0/16"

public_subnets = {
  subnet_1 = {
    cidr_block        = "172.16.0.0/24"
    availability_zone = "eu-central-1a"
  }
  subnet_2 = {
    cidr_block        = "172.16.1.0/24"
    availability_zone = "eu-central-1b"
  }
}

private_subnets = {
  subnet_1 = {
    cidr_block        = "172.16.2.0/24"
    availability_zone = "eu-central-1a"
  }
  subnet_2 = {
    cidr_block        = "172.16.3.0/24"
    availability_zone = "eu-central-1b"
  }
}
The key variables that need to be updated are:
user_email_address – This email will be used to create an Amazon AppStream 2.0 user, allowing access to the Elastic Fleet.
user_first_name – First name assigned to the AppStream 2.0 user account.
user_last_name – Last name assigned to the AppStream 2.0 user account.
Once these variables are updated, initialize and apply the Terraform configuration by running:
terraform init
terraform apply
This process initializes the necessary Terraform providers and provisions the required infrastructure.
Warning
For this example, we use simple credentials (admin / supersecretpassword) for the RDS MySQL database, which do not meet modern security standards.
In production environments, always use strong, unique passwords and follow security best practices. Here, weak credentials are used only to streamline the setup and focus on demonstrating AppStream 2.0’s functionality.
Step 2: Create DBeaver VHD
After deploying the base infrastructure, the next step is to create a Virtual Hard Disk (VHD) containing DBeaver using the AppStream Image Builder instance. This VHD will later be uploaded to Amazon S3 and used by the Elastic Fleet to stream the application to end users.
Connect to Image Builder Instance
To begin, navigate to the AppStream section in the AWS Console. A running Image Builder instance should be available. Select the instance and click Connect to establish a session.
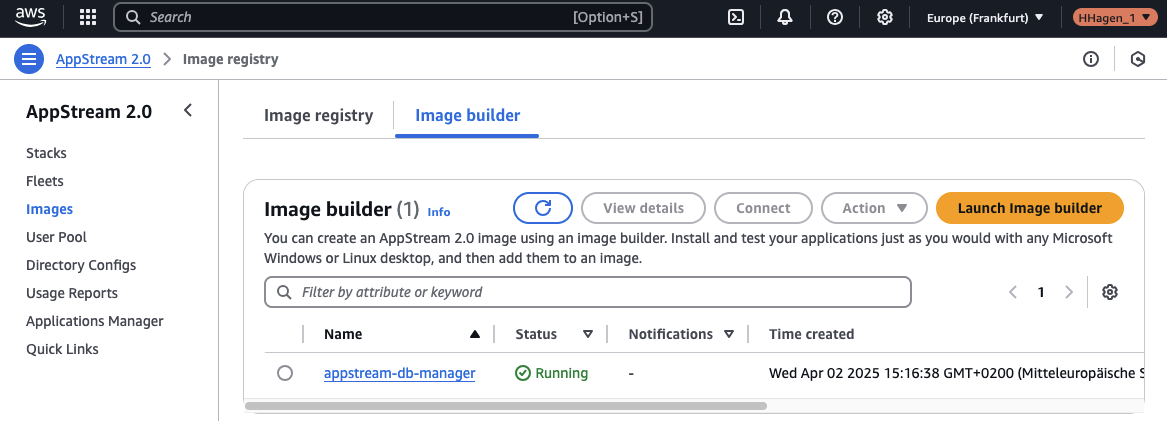
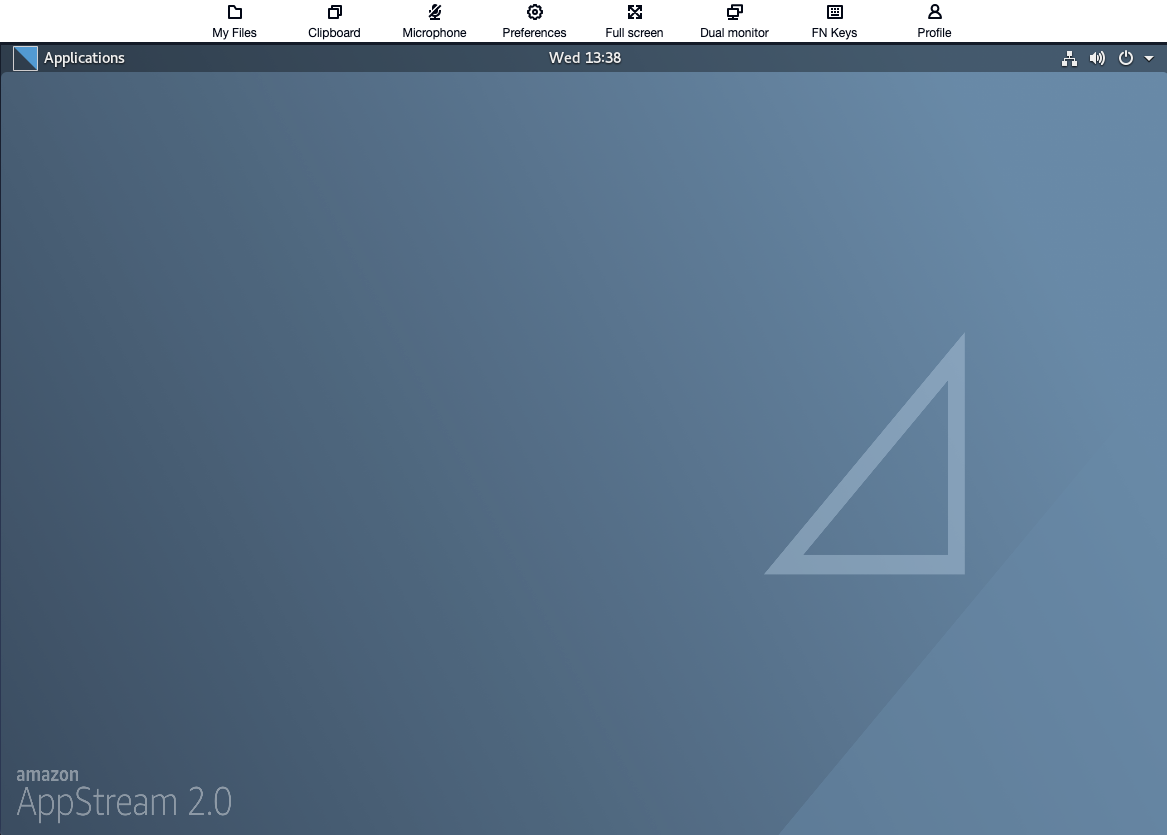
Once connected, the AppStream Image Builder desktop will appear. To create the DBeaver VHD, the terminal will be used. Click on Applications in the top menu and open a new terminal session.
Create a Virtual Disk Image
In the next few sections, we will walk through the steps to create a virtual disk image, install DBeaver on it, and upload the image to an S3 bucket for use with Amazon AppStream 2.0. The first step is creating a 1GB virtual disk image. This is done using the dd command, which writes zeros to the file to create a blank image. This will generate a file called dbeaver.img, which acts like a hard drive that will later hold the DBeaver application.
dd if=/dev/zero of=dbeaver.img bs=1G count=1
Format the Disk Image
Next, we need to format the disk image with a filesystem. The mkfs command formats the image using the ext4 filesystem, which is commonly used on Linux systems. Now, the image is ready to store data.
sudo mkfs -t ext4 dbeaver.img
Mount the Image
To interact with the disk image, we need to “mount” it, which means connecting it to a directory so we can access and modify its contents. This creates a mount point at /mnt/dbeaver-vhd and mounts the dbeaver.img file there, making it act like a regular disk drive.
sudo mkdir /mnt/dbeaver-vhd
sudo mount -t auto -o loop dbeaver.img /mnt/dbeaver-vhd
Download and Extract DBeaver
Now, we download the DBeaver application package from the official website and extract it. These commands download and unpack the DBeaver community edition tarball, which contains the necessary files for installation.
wget https://dbeaver.io/files/dbeaver-ce-latest-linux.gtk.x86_64.tar.gz
tar -xvf dbeaver-ce-latest-linux.gtk.x86_64.tar.gz
Copy DBeaver to the Virtual Disk
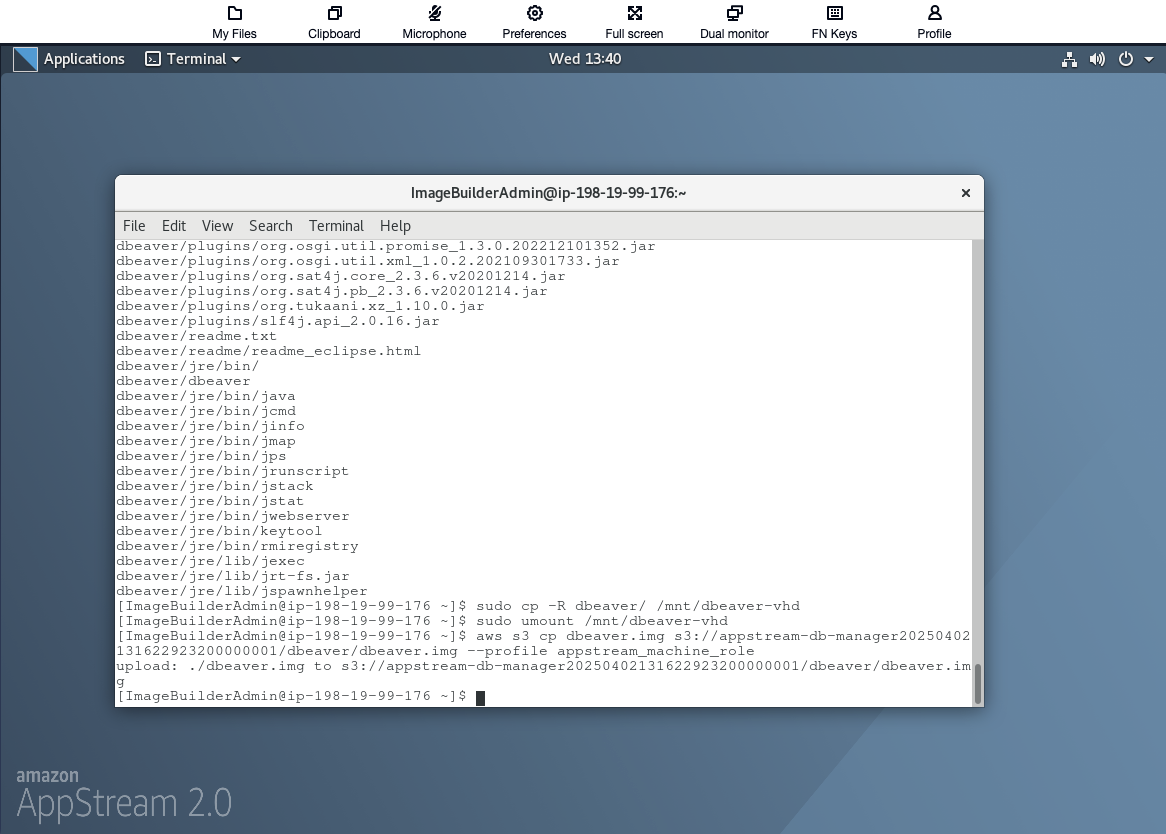
Once DBeaver is extracted, we copy its files into the mounted disk image. This step installs DBeaver onto the virtual disk, preparing it for use.
sudo cp -R dbeaver/ /mnt/dbeaver-vhd
Unmount the Image
After copying the files, we unmount the virtual disk image, which makes it ready for upload.
sudo umount /mnt/dbeaver-vhd
Upload the Image to S3
Finally, the disk image is uploaded to an S3 bucket, ensuring it is securely stored and accessible for AppStream 2.0. The aws s3 cp command transfers the dbeaver.img file to the designated S3 bucket. The placeholder S3_BUCKET_NAME should be replaced with the actual bucket name created during infrastructure deployment, which can be found in the Terraform output under s3_bucket_name.
aws s3 cp dbeaver.img s3://S3_BUCKET_NAME/dbeaver/dbeaver.img --profile appstream_machine_role
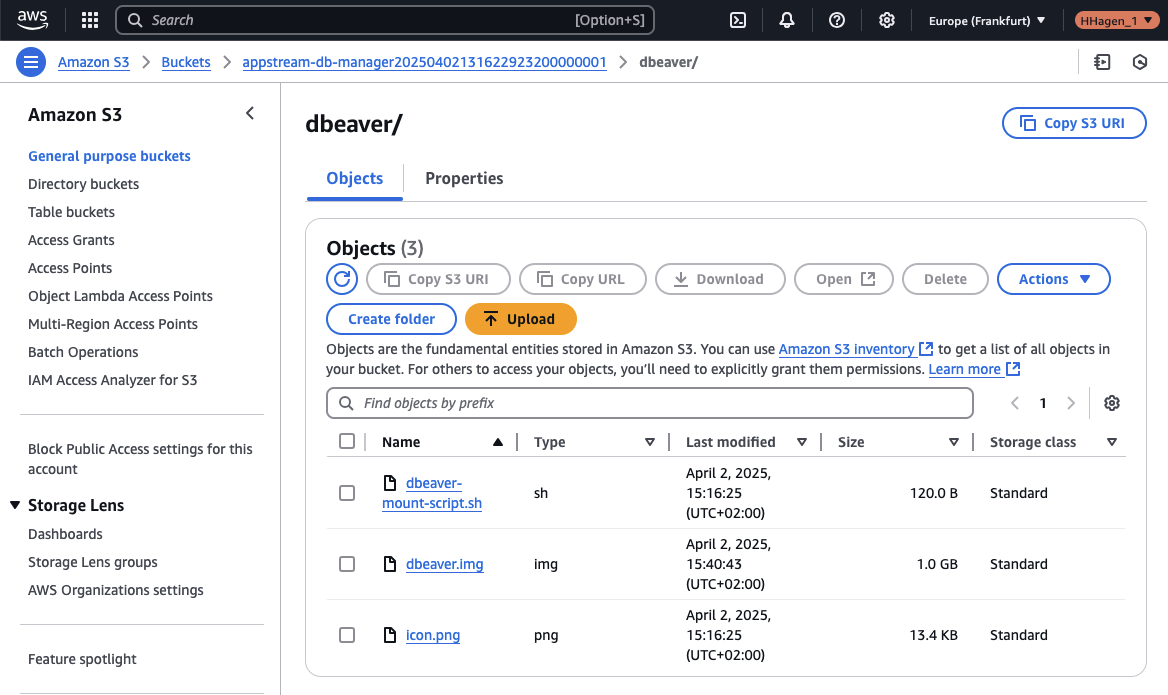
Before proceeding to the next steps, verify the contents of the S3 bucket. It should contain the following objects:
dbeaver-mount-script.sh – A setup script used to mount the VHD before launching the application.
dbeaver.img – The Virtual Hard Disk (VHD) containing the DBeaver application.
icon.png – The application icon that AppStream uses to display DBeaver.
Step 3: Create AppStream 2.0 Application
Once the VHD file is uploaded, we will proceed by creating an AppStream Application for Elastic Fleets. This process involves two main steps: first, creating an App Block, and then using that App Block to create the AppStream Application.
App Blocks represent a virtual hard disk (VHD) stored in an Amazon S3 bucket. This VHD contains the application files and binaries needed to launch the applications for users. App Blocks also include the setup script, which defines how the operating system should handle the VHD.
Applications, on the other hand, include the necessary information for launching the application after the VHD is mounted. They also specify the name and icon that will appear to users in the application catalog. Applications are linked to App Blocks that hold the application files and binaries.
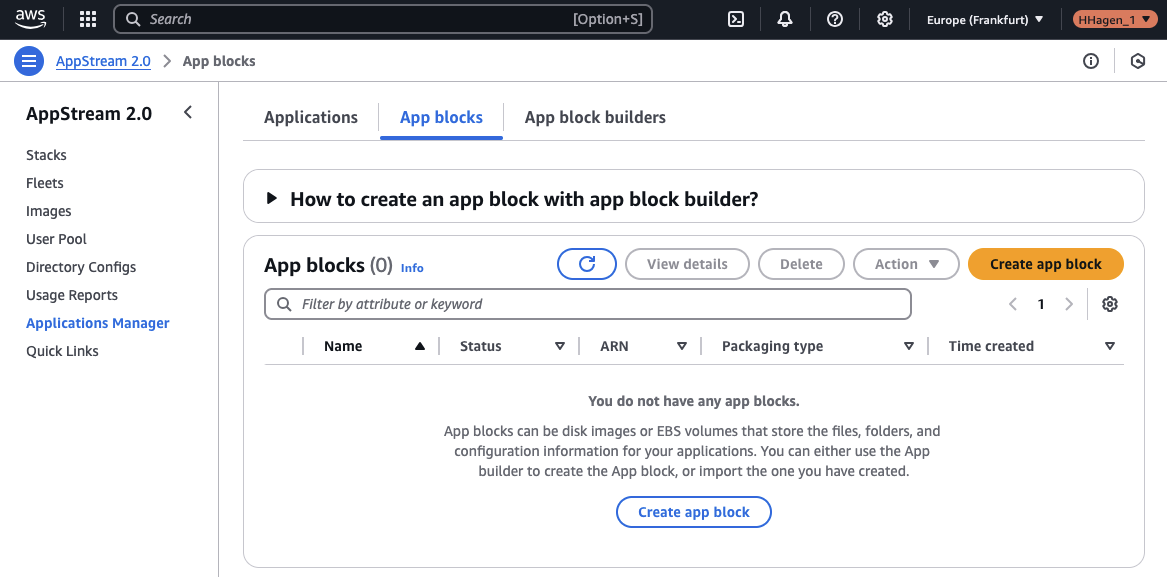
Create DBeaver App Block
To begin, we will create an App Block for DBeaver. In the AppStream 2.0 console, go to Application Manager and select App blocks. Click Create app block to start the process.
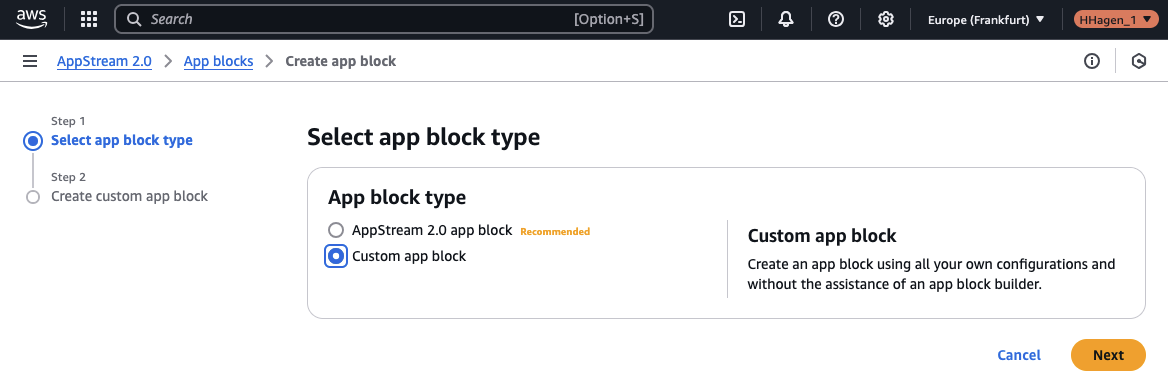
Select Custom app block as the App Block type and click Next.
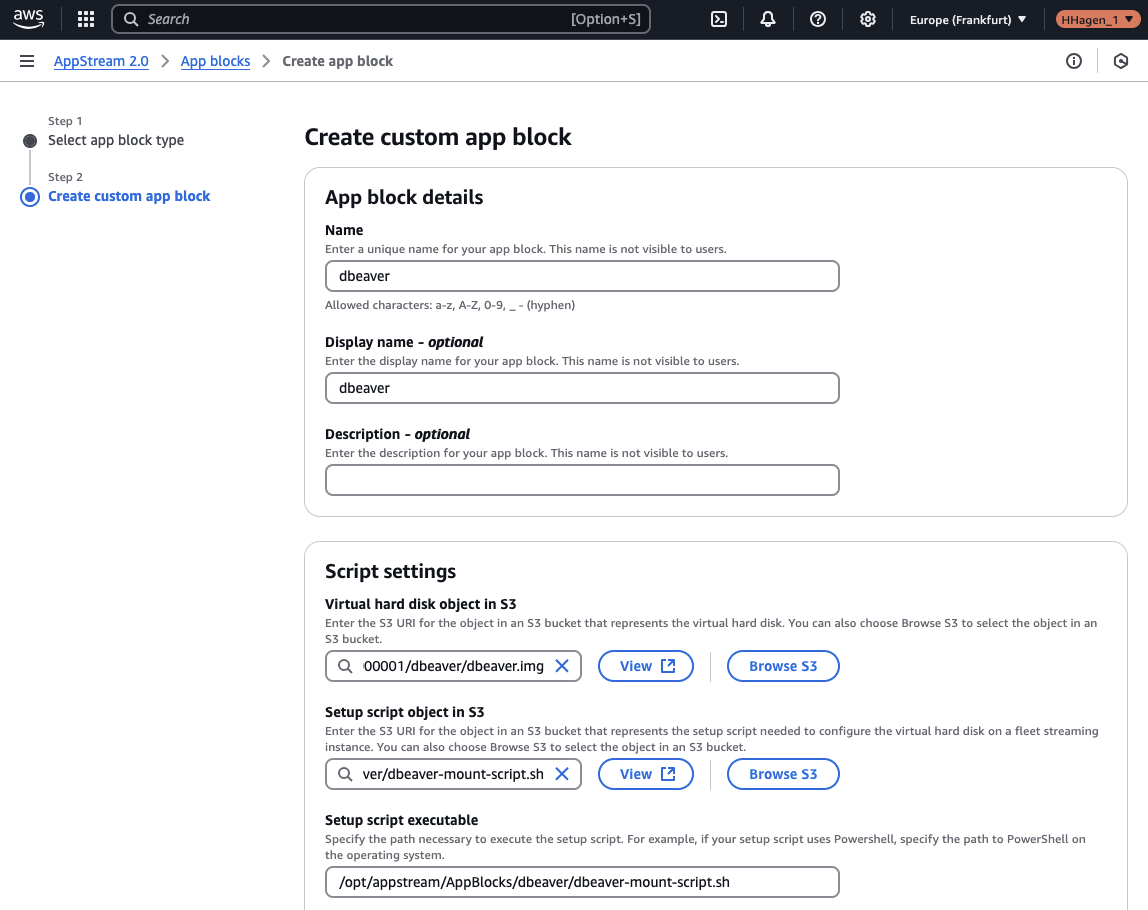
On the next screen, enter dbeaver as both the App Block name and display name. For the Virtual hard disk object in S3, select the dbeaver.img file that was uploaded to the S3 Bucket. For the Setup script object in S3, choose the dbeaver-mount-script.sh file from the same S3 Bucket. Set the Setup script executable to /opt/appstream/AppBlocks/dbeaver/dbeaver-mount-script.sh. This is the location where AppStream 2.0 will place the script after it is downloaded from S3.
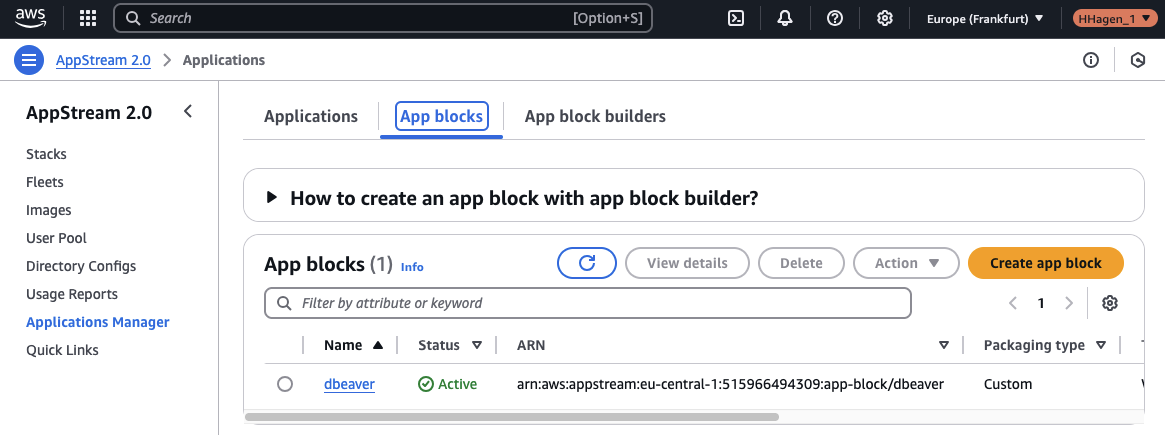
After configuring these settings, create the App Block. You should see the new App Block in the AppStream console.
Create Application
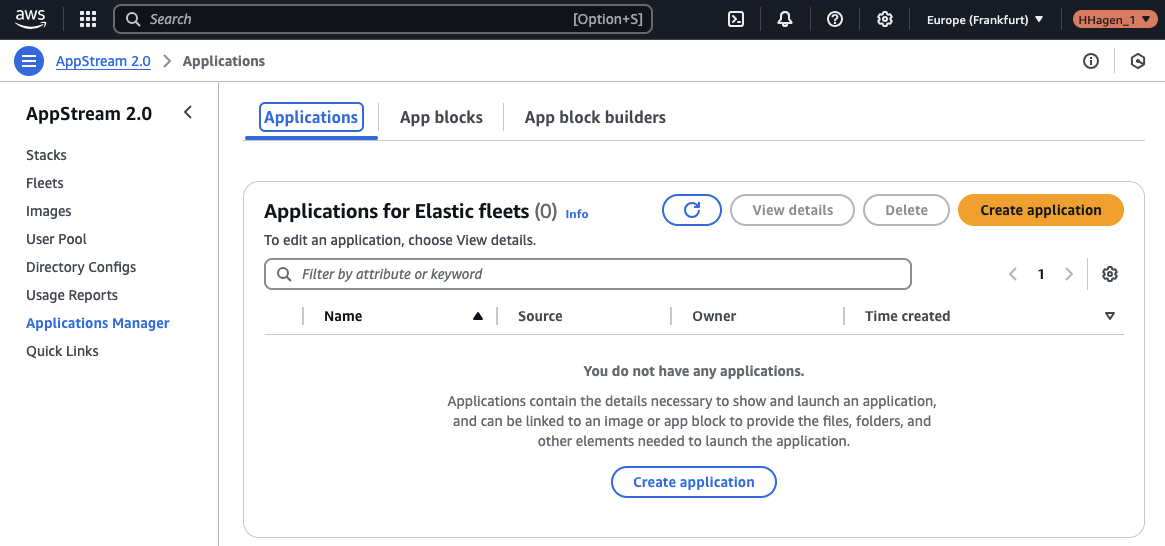
Once the App Block is created, the next step is to create an application based on this App Block. In the Applications tab, click to create a new application.
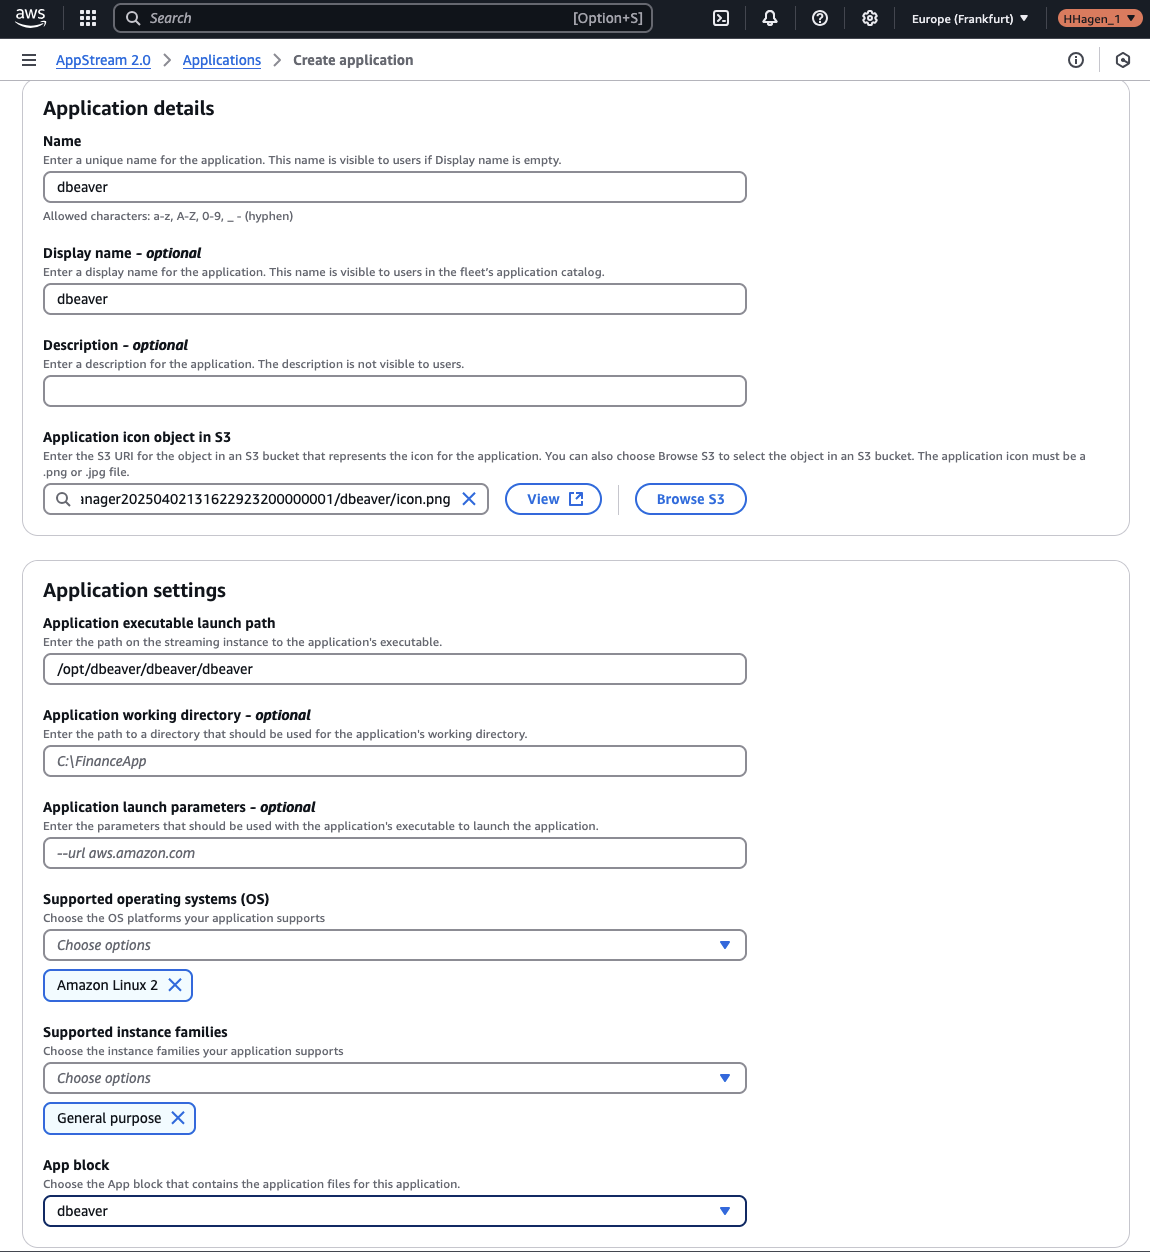
Set both the Application name and Display name to dbeaver. For the Application icon object in S3, select the icon.png object that is located in the same S3 bucket. Set the Application executable launch path to /opt/dbeaver/dbeaver/dbeaver. Choose Amazon Linux 2 as the supported operating system and select General purpose for the instance family. Finally, choose dbeaver as the App block.
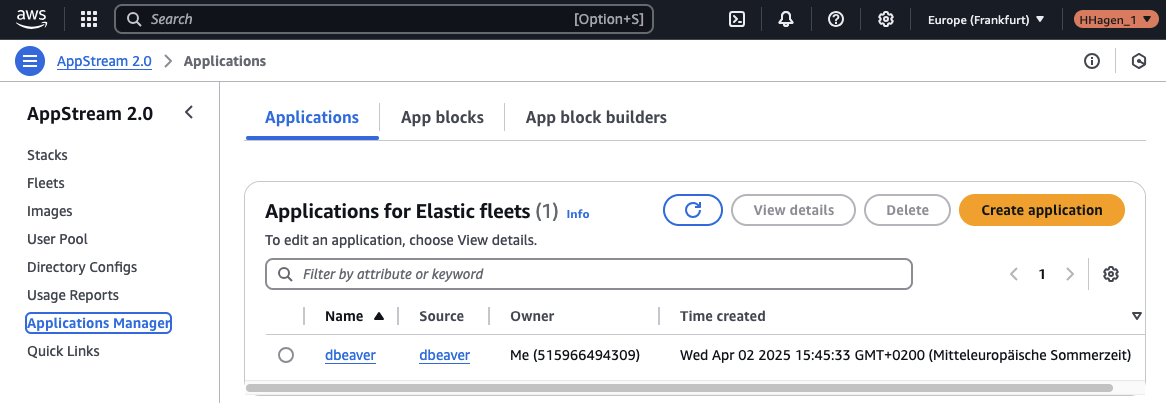
Once the application is created, it will appear in the AppStream console.
Step 4: Create Elastic Fleet
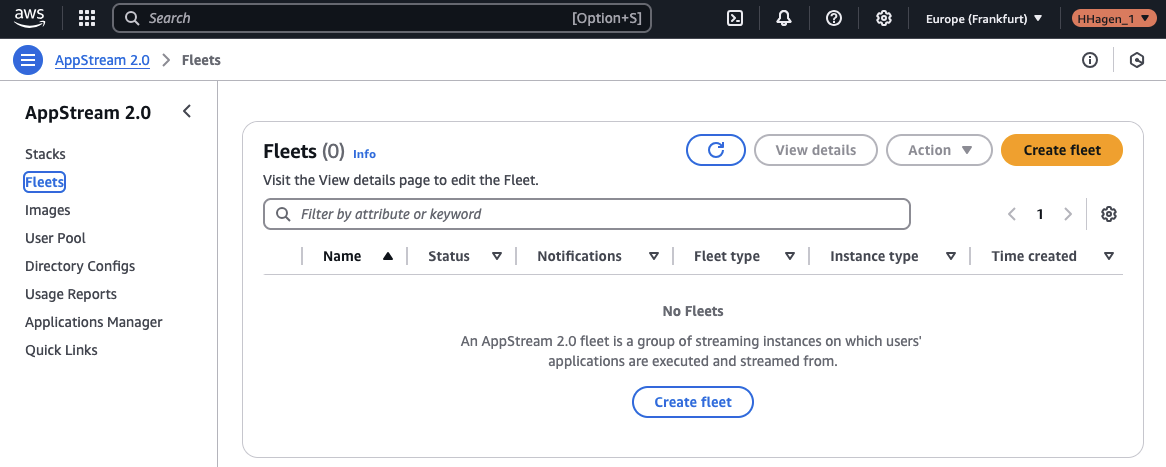
After the DBeaver application is created, the next step is to create an Elastic Fleet using this application. In the AppStream console, go to Fleets and create a new fleet.
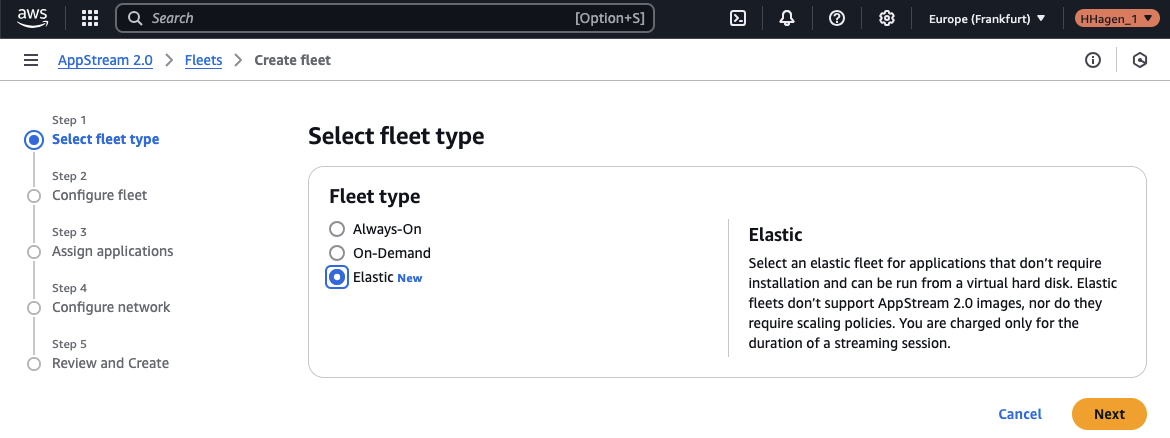
Select Elastic as the fleet type. This will allow us to run the application from the virtual hard disk while AppStream 2.0 automatically handles scaling and infrastructure management. You’ll only be billed for the duration of user streaming sessions.
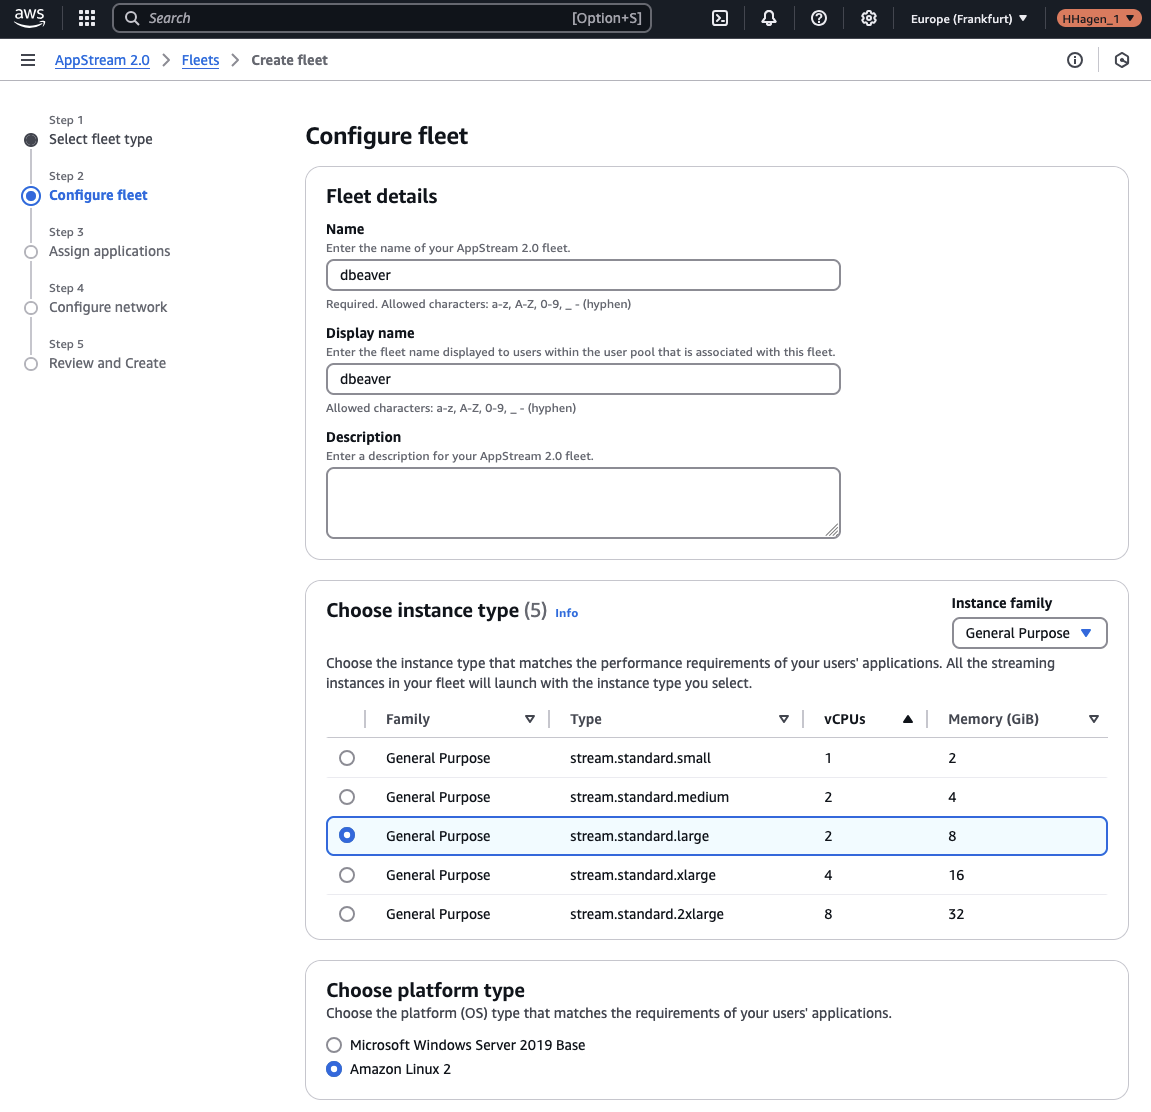
Set the fleet name and display name to dbeaver. For the instance type, choose stream.standard.large, and select Amazon Linux 2 as the platform type.
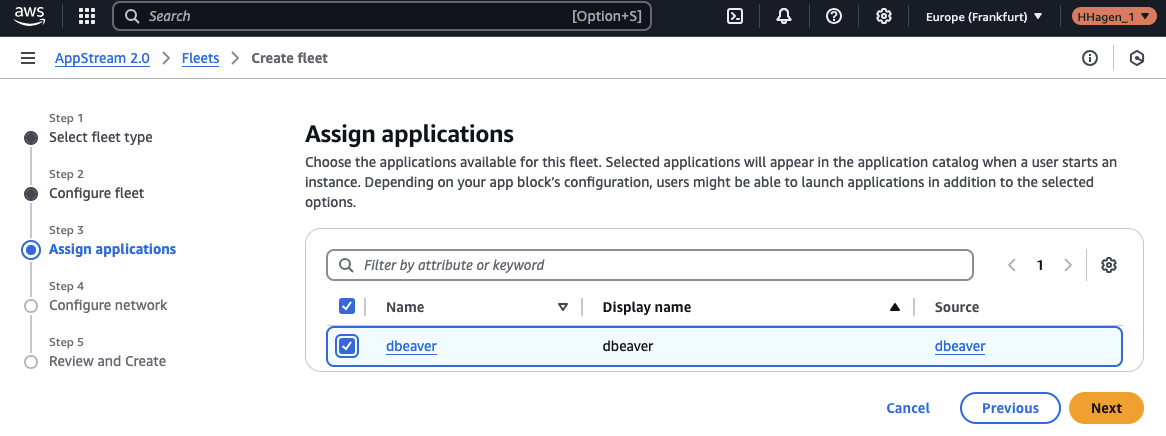
On the next screen, you will assign the dbeaver application to the Elastic Fleet. This will ensure that the application appears in the catalog once the fleet is started and a user begins a session.
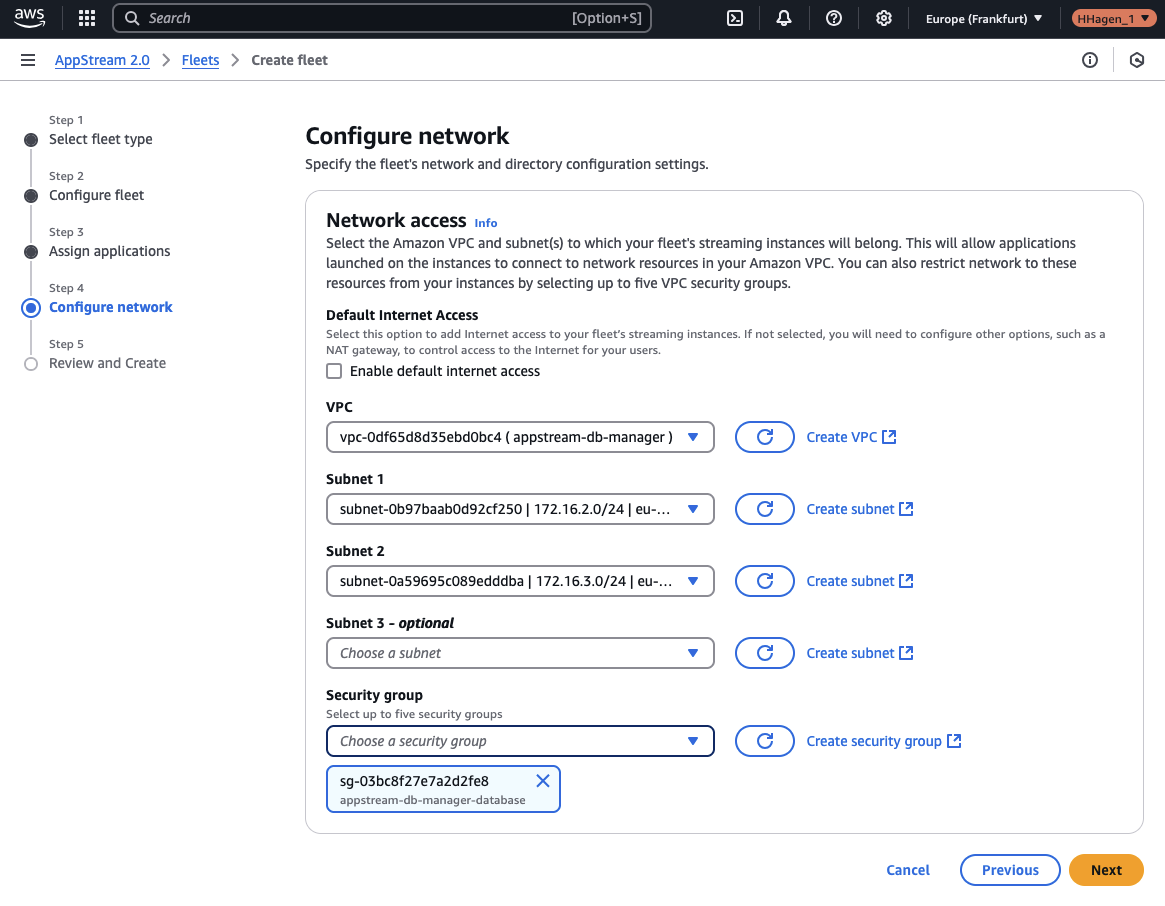
Next, configure the network settings to enable communication between the Elastic Fleet and the RDS MySQL database. Select the appstream-db-manager VPC that was created during the initial infrastructure setup. Choose both private subnets as the subnet 1 and subnet 2 selections. For the security group, select appstream-db-manager-database to allow the fleet to communicate with the RDS instance.
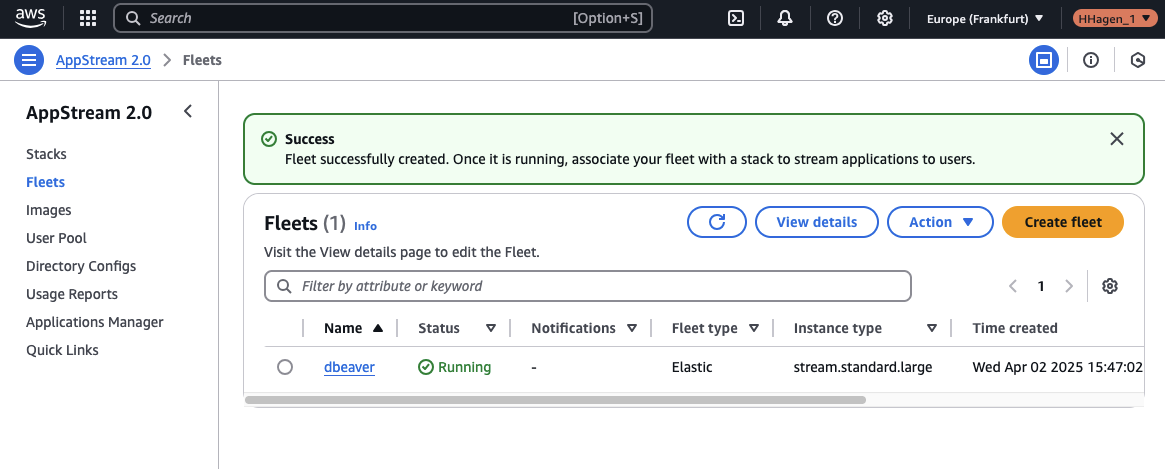
Once these settings are complete, you should see the new Elastic Fleet up and running in the AppStream console.
The final step is to associate the Elastic Fleet with the AppStream stack that was created during the initial infrastructure setup. To do this, navigate to the Terraform configuration and open the appstream.tf file. At the top of the file, you will find the following code block:
/*
################################################################################
# AppStream Fleet Association
################################################################################

resource "aws_appstream_fleet_stack_association" "this" {
  fleet_name = var.appstream_fleet_name
  stack_name = aws_appstream_stack.this.name
}
*/
As shown, this code block is currently commented out. To proceed, remove the comments around the block and then run the terraform apply command to create the fleet association.
Step 5: Setup DBeaver
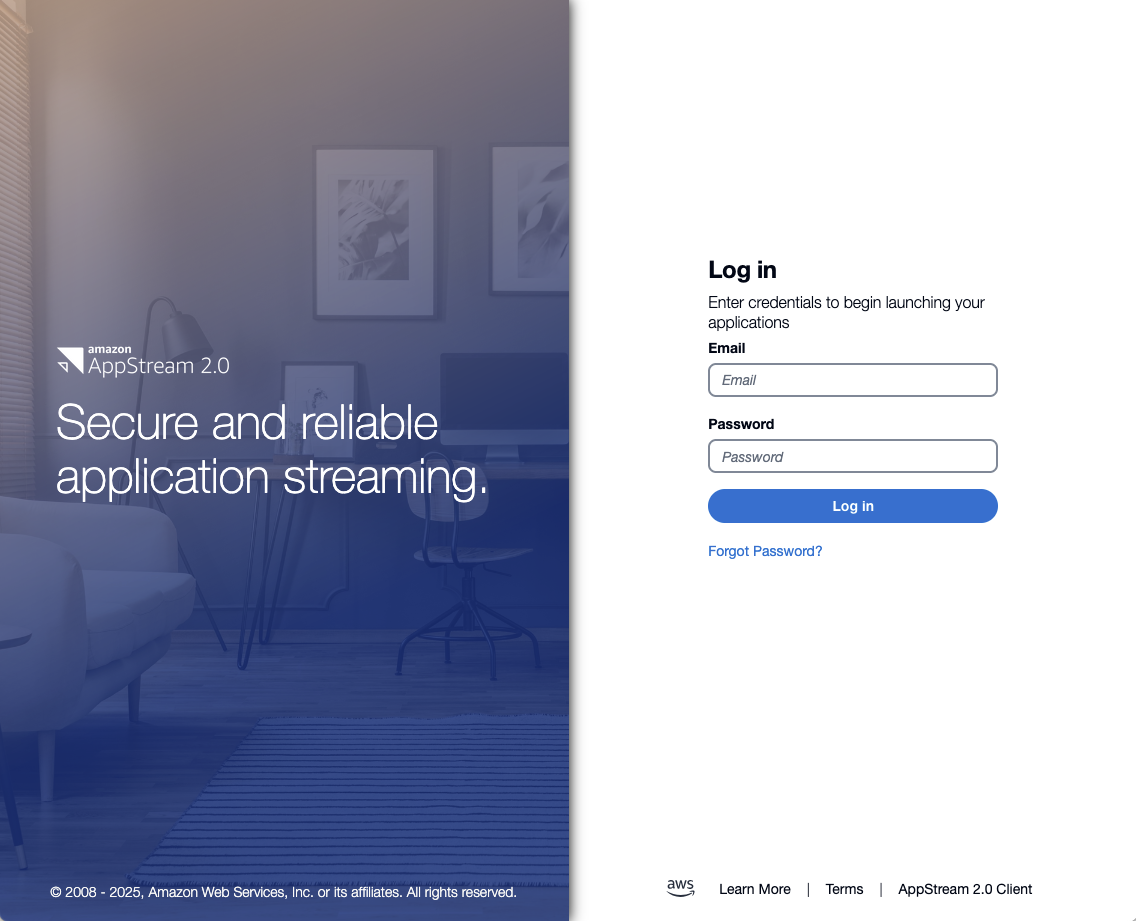
Once the Elastic Fleet is up and running, it’s time to test the DBeaver application. After deploying the infrastructure, you should receive an email from Amazon AppStream containing a link to the login page, as well as the temporary password for the user we created during the infrastructure setup. Open the link, log in with your credentials, and you will be prompted to change your password. After updating your password, log in again.
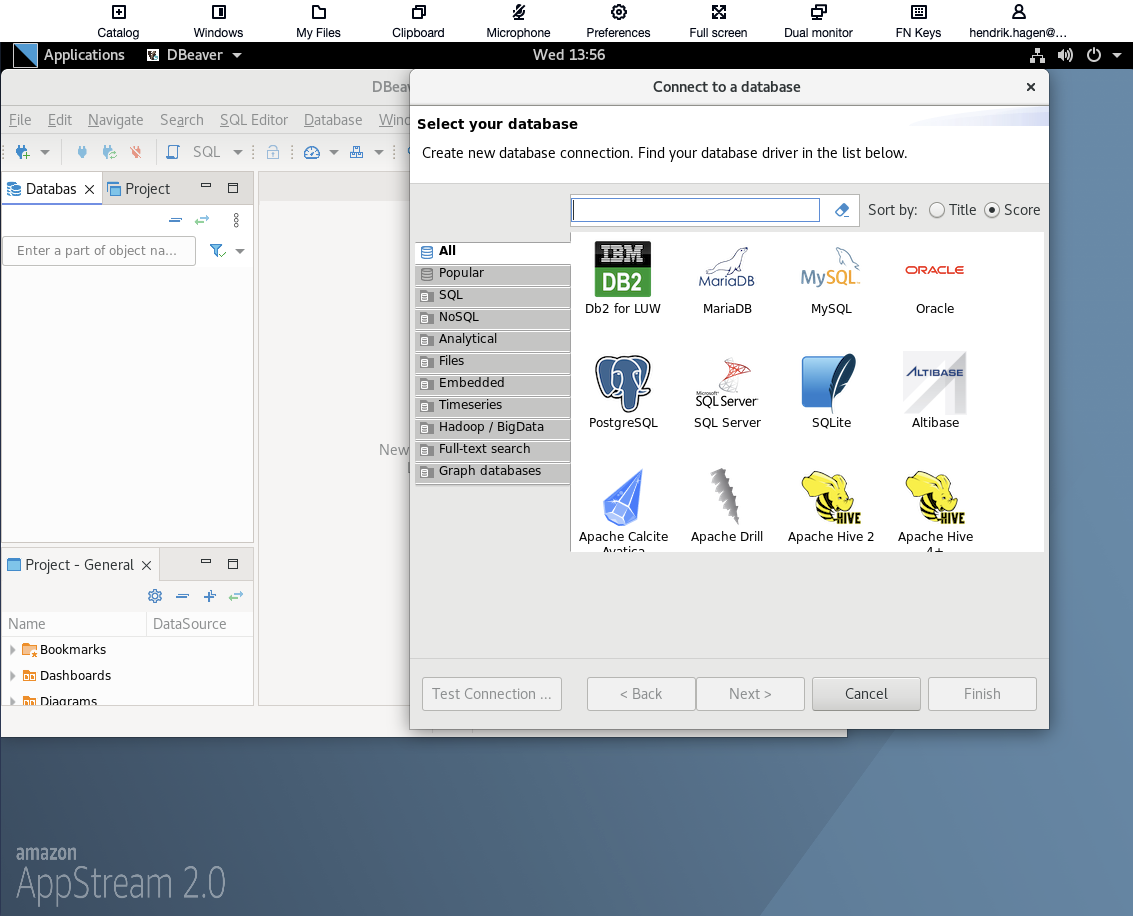
Once logged in, DBeaver should launch automatically, and you should see the application on your fleet session’s desktop. Since our RDS database is MySQL, we’ll need to create a new MySQL connection. Select MySQL on the Connect to a database screen and click Next.
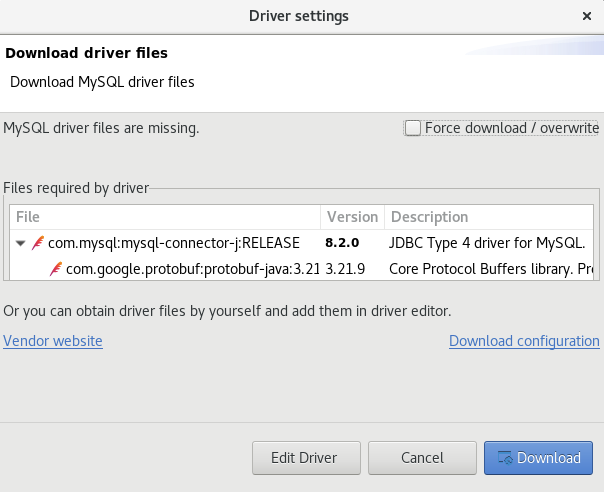
You might be prompted to download missing MySQL drivers. Simply click Download to install them.
Before we can manage the database, we need to set up the connection. You’ll need to fill out the following four fields:
Server Host – The RDS database endpoint, which you can find in the RDS console or from the Terraform output under rds_endpoint.
Database – Enter bookstoredb.
Username – Enter admin.
Password – Enter supersecretpassword.

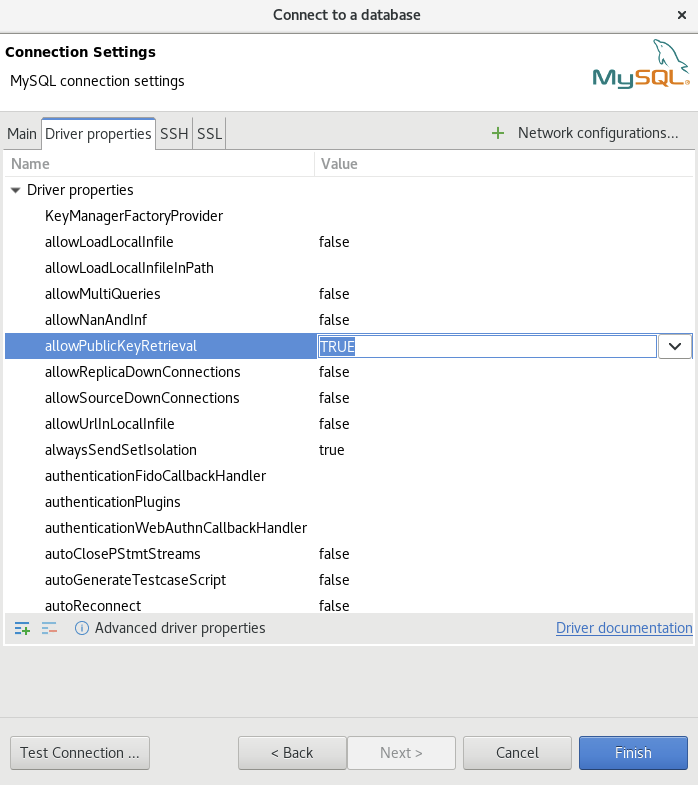
Before finalizing the connection, make sure to adjust the driver properties. Select the Driver properties tab and set the allowPublicKeyRetrieval property to TRUE. Afterward, click Finish to complete the connection setup.
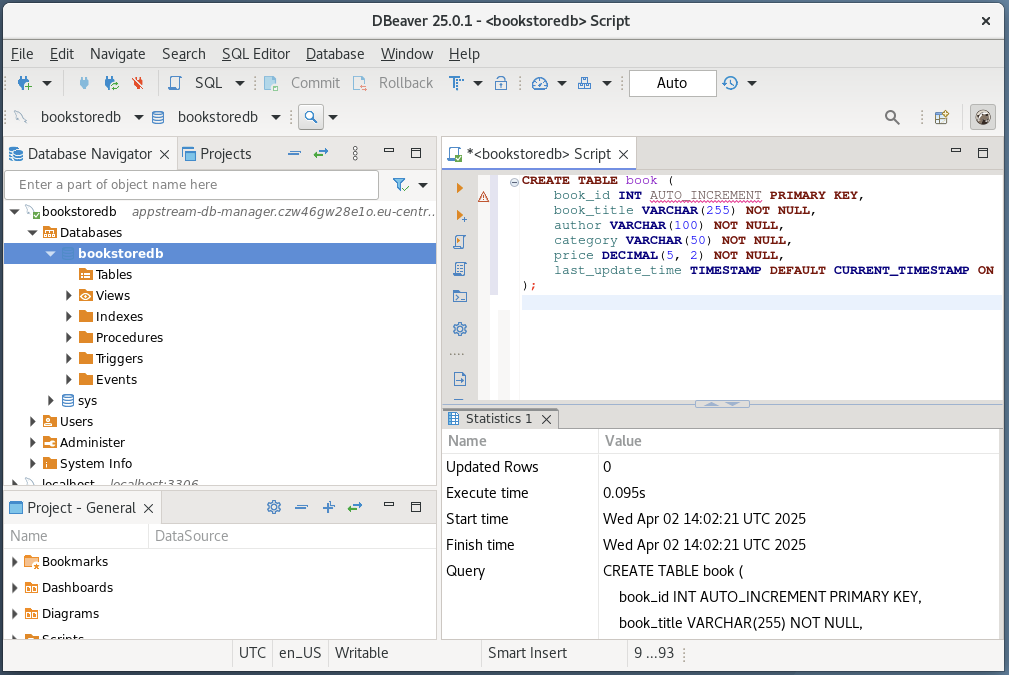
Now that the connection is established, let’s test the functionality by making some sample changes to the database. Open the SQL editor and use the following SQL statement to create a new table:
CREATE TABLE book (
    book_id INT AUTO_INCREMENT PRIMARY KEY,
    book_title VARCHAR(255) NOT NULL,
    author VARCHAR(100) NOT NULL,
    category VARCHAR(50) NOT NULL,
    price DECIMAL(5, 2) NOT NULL,
    last_update_time TIMESTAMP DEFAULT CURRENT_TIMESTAMP ON UPDATE CURRENT_TIMESTAMP
);
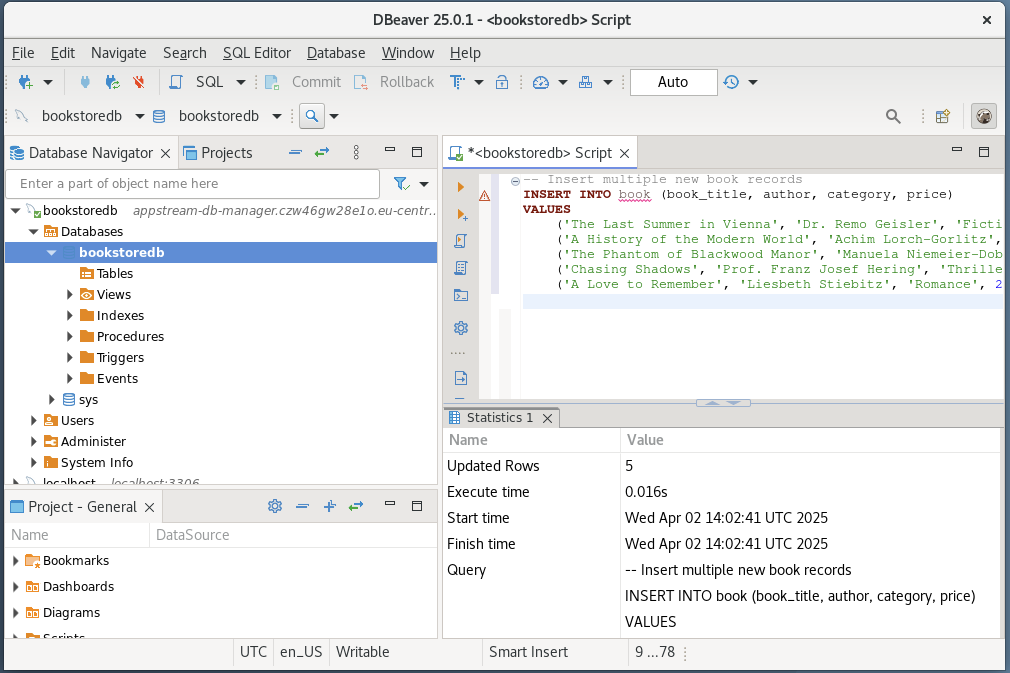
Next, add some sample data with the following script:
-- Insert multiple new book records
INSERT INTO book (book_title, author, category, price)
VALUES
    ('The Last Summer in Vienna', 'Dr. Remo Geisler', 'Fiction', 20.99),
    ('A History of the Modern World', 'Achim Lorch-Gorlitz', 'Non-Fiction', 10.47),
    ('The Phantom of Blackwood Manor', 'Manuela Niemeier-Dobes', 'Mystery', 25.15),
    ('Chasing Shadows', 'Prof. Franz Josef Hering', 'Thriller', 25.18),
    ('A Love to Remember', 'Liesbeth Stiebitz', 'Romance', 22.61);
Select the newly created table to preview the data, and you should see the records added successfully.
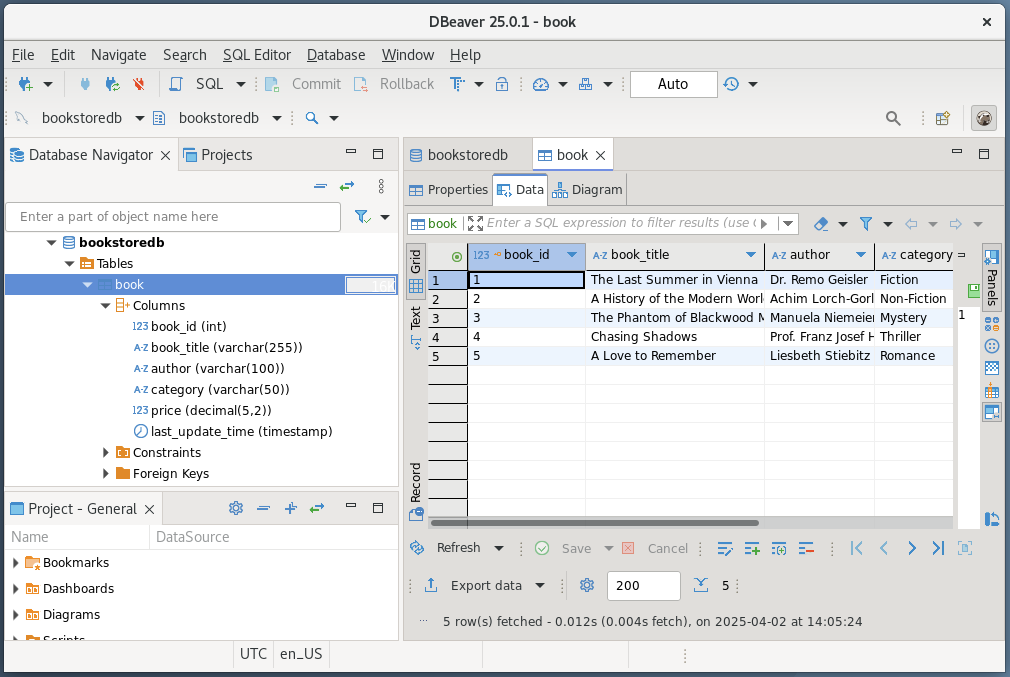
Congratulations! You’ve just set up an Amazon AppStream 2.0 Elastic Fleet with a custom VHD application to manage your RDS databases. This setup is designed to showcase the potential of AppStream 2.0 and can easily be expanded or adapted for other use cases. Feel free to experiment and build upon this demo.
Step 6: Clean up
Once you’ve finished the demo, it’s important to clean up your infrastructure. Start by navigating to the AppStream console and stopping the Elastic Fleet. After stopping the fleet, delete it. Then, delete the application and the App block associated with the fleet.
Finally, head over to the Terraform configuration and run the terraform destroy command to remove the base infrastructure. This will ensure that all resources are properly cleaned up.
Summary
In this blog, we explored how Amazon AppStream 2.0 can streamline application delivery by enabling users to securely access and use applications like DBeaver for managing RDS databases without needing local installations. We walked through the process of deploying a scalable, serverless Elastic Fleet, creating a Virtual Hard Disk (VHD) for DBeaver, and configuring the infrastructure to allow seamless access to the application. By leveraging AppStream 2.0, businesses can provide remote access to applications efficiently and cost-effectively, while simplifying software management and ensuring users always have the latest version. This approach opens up new possibilities for scaling and optimizing your application delivery model in today’s fast-paced digital landscape.
I hope you enjoyed this example and learned something new. I look forward to your feedback and questions. For the complete example code, please visit my Github.
— Hendrik
Title Photo by Andy Holmes on Unsplash