
Centralize IAM by integrating Okta with AWS IAM Identity Center via SAML and SCIM.
- Hendrik Hagen
- Aws , Okta
- December 15, 2025
Table of Contents
Introduction
With the rise of SaaS offerings and cloud platforms like AWS, employees have to juggle an ever-growing collection of tools to get their day-to-day work done. As a result, identity management becomes cluttered, permission management grows increasingly opaque, and weak access controls heighten the risk of insider threats and ultimately leaving companies exposed.
In environments like this, having a central identity and access management solution becomes critical. It ensures a strong security posture, simplifies user and access administration, and provides better visibility into processes and user activity.
One widely adopted solution for centralized identity and access management is Okta. As a cloud-native identity platform, Okta serves as a trusted identity provider for thousands of organizations, enabling secure access to applications and infrastructure. Okta’s strengths include robust single sign-on (SSO), lifecycle management, and a large catalog of pre-built application integrations that support standards such as SAML, OIDC, and SCIM. These capabilities allow administrators to centrally manage users and groups in Okta and seamlessly provision access across downstream platforms using Okta-driven policies.
One popular Okta integration is AWS IAM Identity Center (formerly AWS SSO). AWS IAM Identity Center provides centralized workforce access to multiple AWS accounts and cloud applications. While it includes a built-in user directory, its true value is unlocked when paired with an external identity provider like Okta. By using SAML for authentication and SCIM for user and group provisioning, Okta can synchronize identities into AWS IAM Identity Center, dramatically simplifying identity and access management for AWS environments. AWS permissions can then be mapped directly to Okta groups and attributes, creating a clean, scalable, and auditable access model.
In this blog post, I’ll walk through the process of configuring Okta as the identity provider for AWS IAM Identity Center. We’ll set up the Okta application integration, enable SSO and SCIM provisioning, synchronize users and groups, and establish a unified IAM strategy across your AWS cloud environment.
Workflow
I’ll start by introducing the infrastructure we’ll build throughout this blog post. The architecture diagram below provides a high-level overview of the components involved and the workflow we’ll implement step by step. Our objective is to integrate Okta with AWS IAM Identity Center by using an Okta application integration, SAML-based single sign-on (SSO), and SCIM provisioning for identity synchronization.
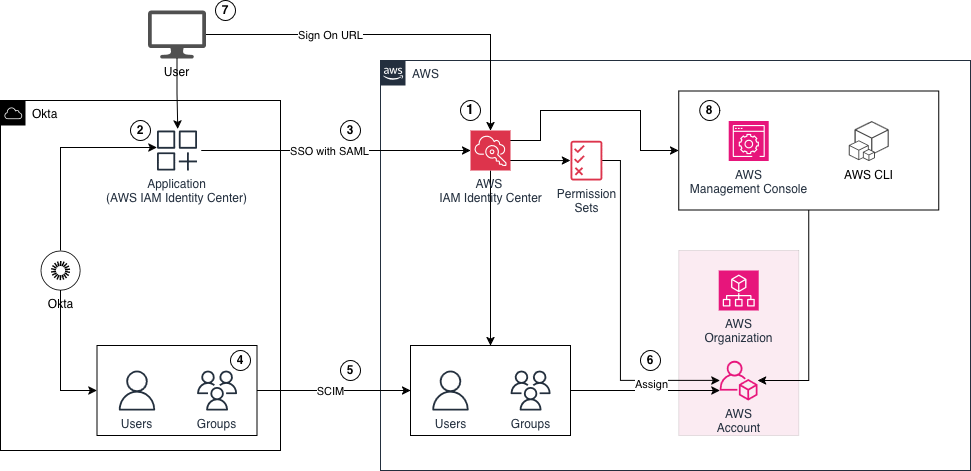
We begin by configuring AWS IAM Identity Center and setting up a new identity source. By default, Identity Center uses its internal directory, but in this setup we will configure Okta as the external identity provider.
Next, we’ll create an application integration for AWS IAM Identity Center in Okta. This application will allow us to assign Okta users and groups and grant them access to AWS through AWS IAM Identity Center.
After creating the Okta application integration, we’ll configure SSO between Okta and AWS IAM Identity Center using SAML. This enables users to authenticate to AWS IAM Identity Center through Okta, leveraging Okta as the central authentication authority.
With SSO in place, we’ll create a few identities in Okta to demonstrate the integration. We’ll create a group in Okta, assign it to the AWS IAM Identity Center application, and then create a sample user and add that user to the group. This approach allows us to manage AWS access centrally through Okta groups instead of individual user assignments.
To make these identities available in AWS, we’ll configure SCIM provisioning between Okta and AWS IAM Identity Center. This ensures that users and groups created and assigned in Okta are automatically synchronized into AWS.
Once the identities are synced, we’ll create Permission Sets in AWS IAM Identity Center and map the synchronized Okta groups to Permission Sets and AWS accounts within our organization. This ensures that users who belong to the sample Okta group automatically receive the appropriate permissions when accessing AWS through SSO.
After the group and Permission Set assignments are complete, we’ll switch to the end-user experience. We’ll sign in to Okta as our test user and launch AWS IAM Identity Center via the Okta application to initiate an SSO login.
Finally, once authenticated, we’ll access the AWS Management Console for one of the accounts using the configured Permission Sets, confirming that the Okta-to–AWS IAM Identity Center integration is functioning end to end.
Setup SSO with SAML
Start by enabling IAM Identity Center. Log in to the AWS Console, choose your preferred region, search for AWS IAM Identity Center, and click Enable.

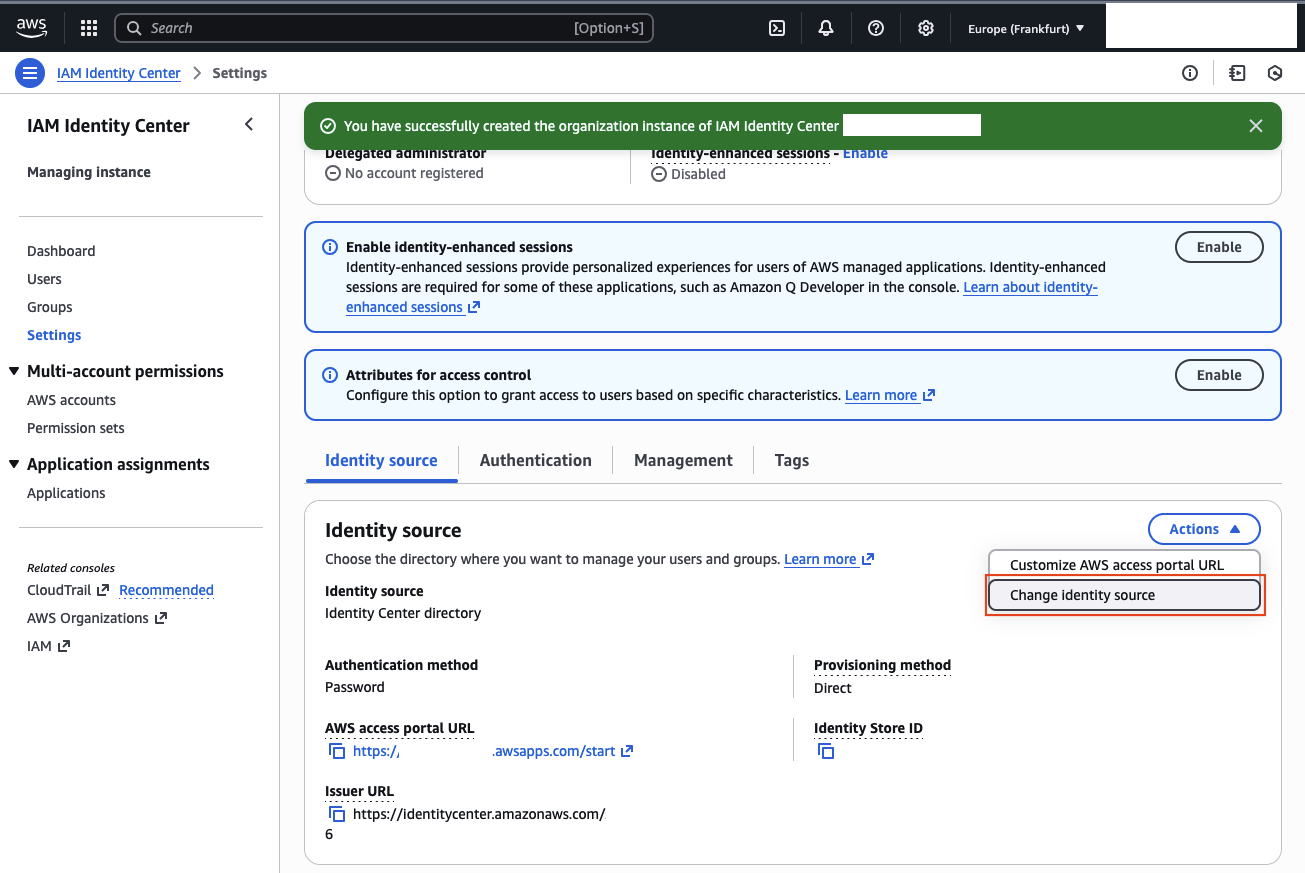
Once IAM Identity Center is active, change the identity source. Open Settings from the left-hand menu, scroll down, and open the Identity source tab. Select Action → Change identity source.
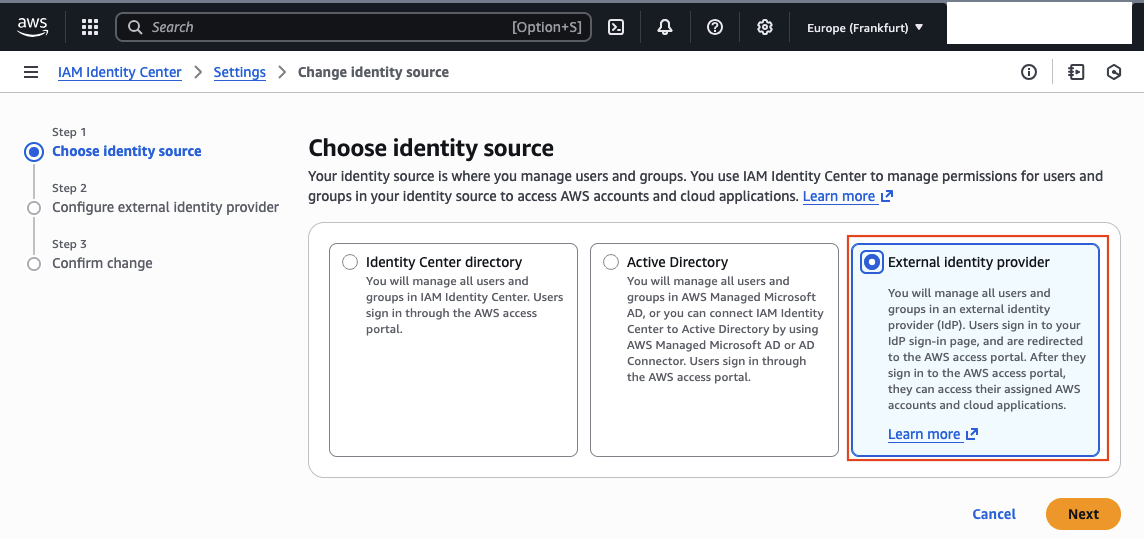
In the new window, choose External identity provider and continue with Next.
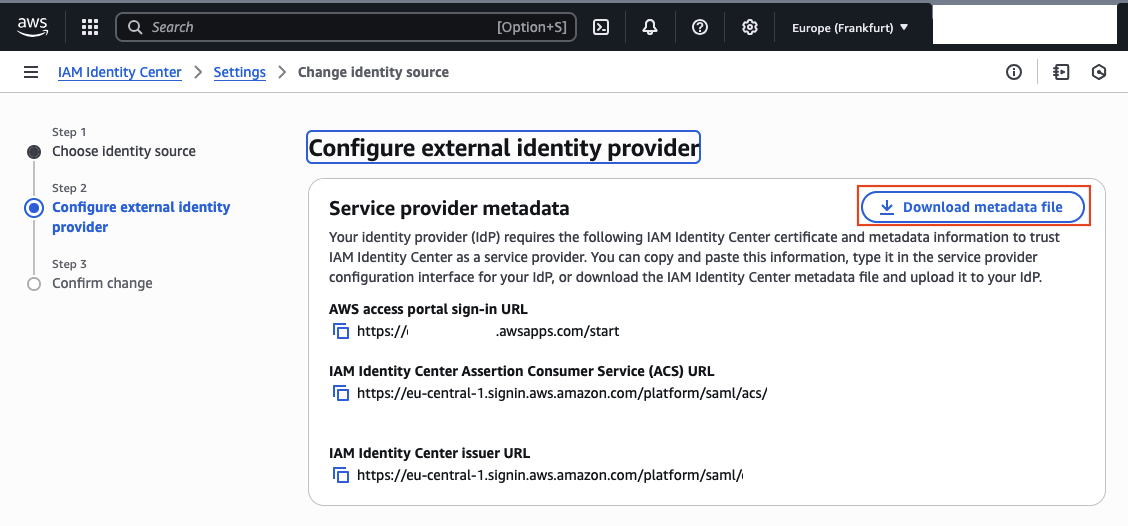
You will now see the AWS configuration details required for the external identity provider.
Download the metadata file to simplify the setup in Okta and note the AWS access portal sign-in URL.
Leave the AWS Console open and switch to Okta.
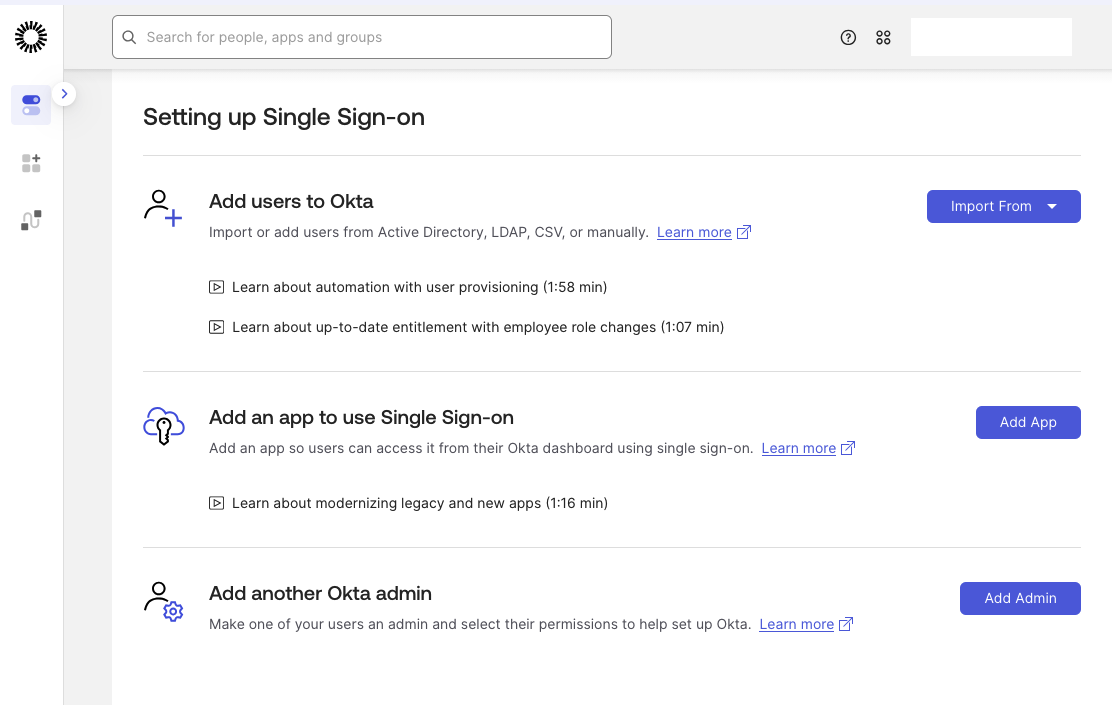
Open the Admin Console in Okta. Scroll to Setting up Single Sign-on and click Add App under Add an app to use Single Sign-On.
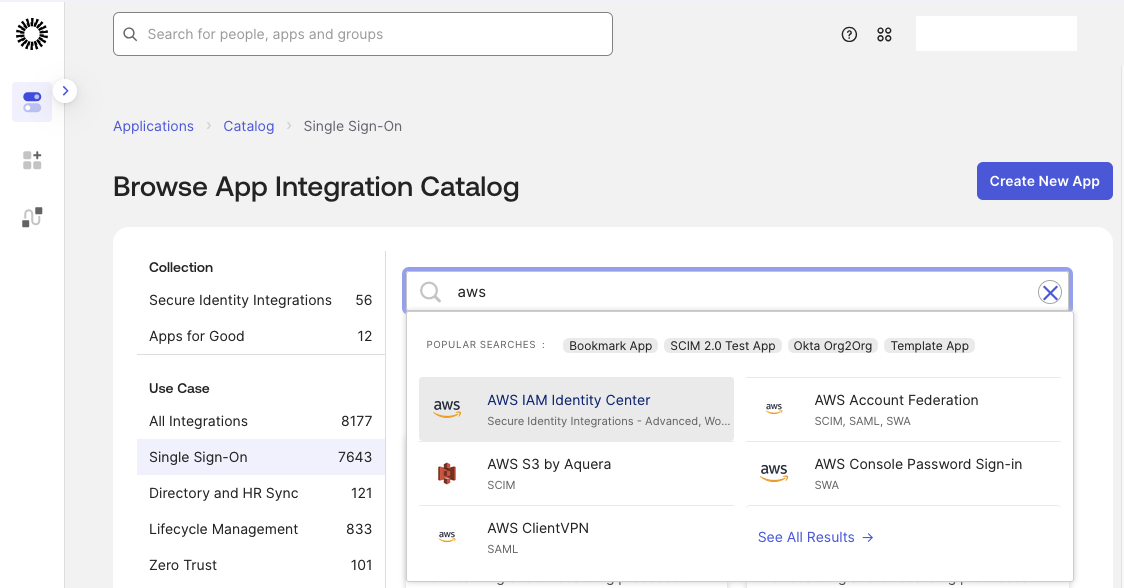
The application catalog opens. Search for AWS and select AWS IAM Identity Center. Click Add Integration.
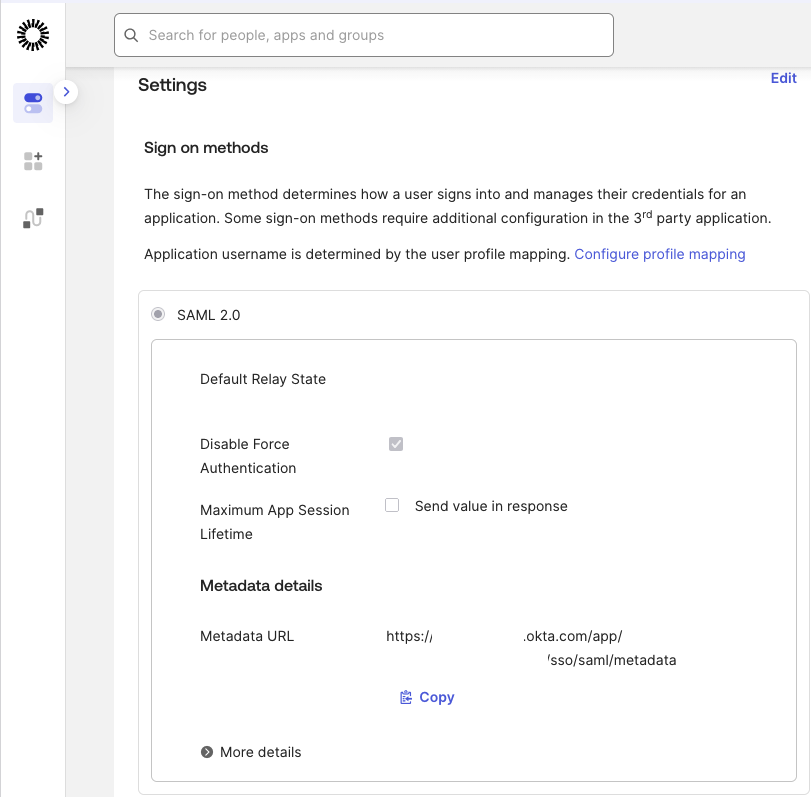
In the application Settings, select SAML 2.0 as the sign-on method.
Copy the Metadata URL, open it in your browser, and save it as metadata.xml.
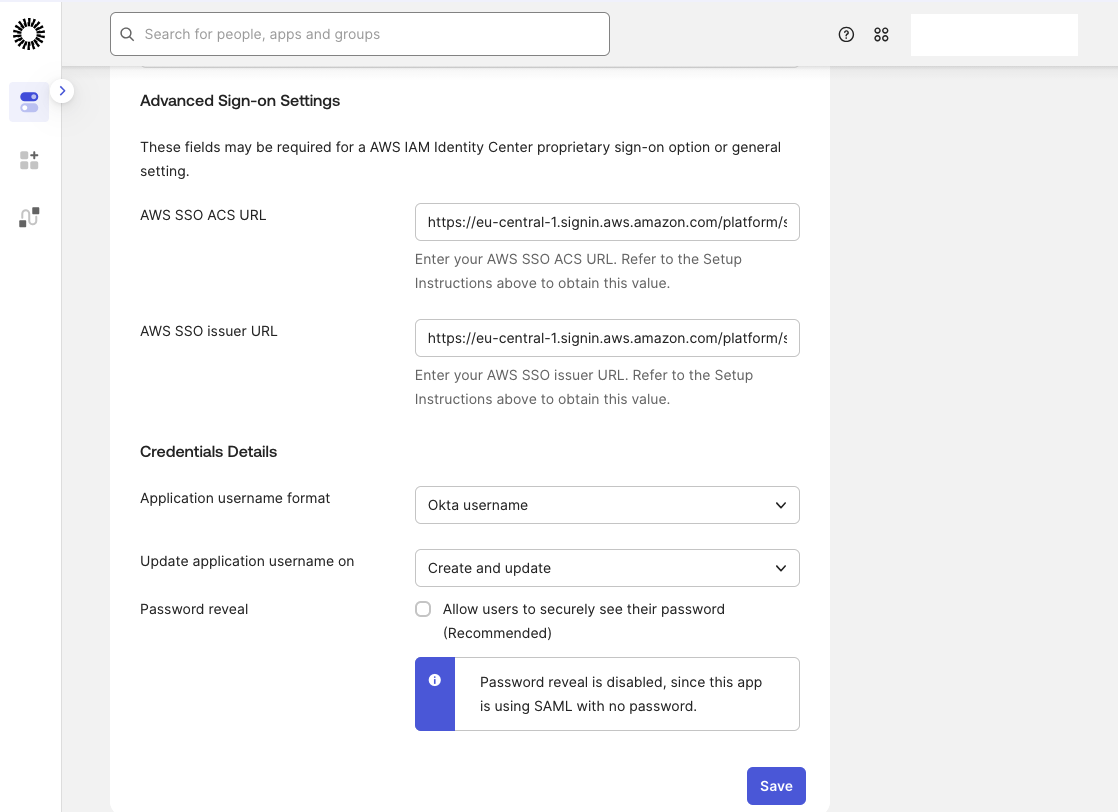
Open the Sign On tab. Click Edit next to Settings. Scroll to Advanced Sign-on Settings and paste:
- AWS SSO ACS URL
- AWS SSO issuer URL
Set Application username format to Okta username. Click Save.
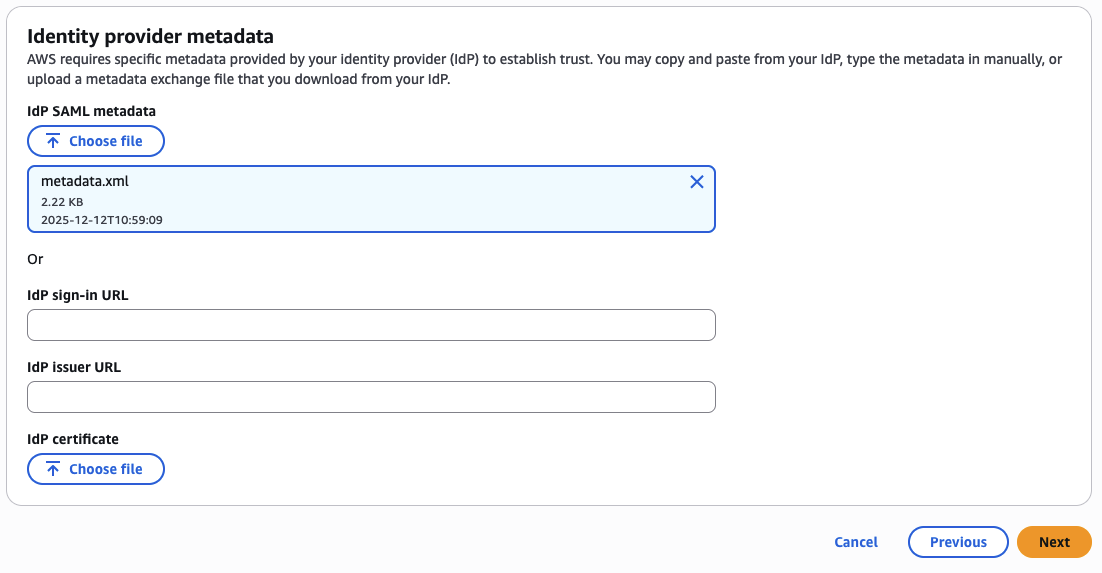
Return to the AWS Console. Upload the Okta metadata file in the External Identity Provider configuration window.
Click Next to complete the SAML setup.
Identity synchronization with SCIM
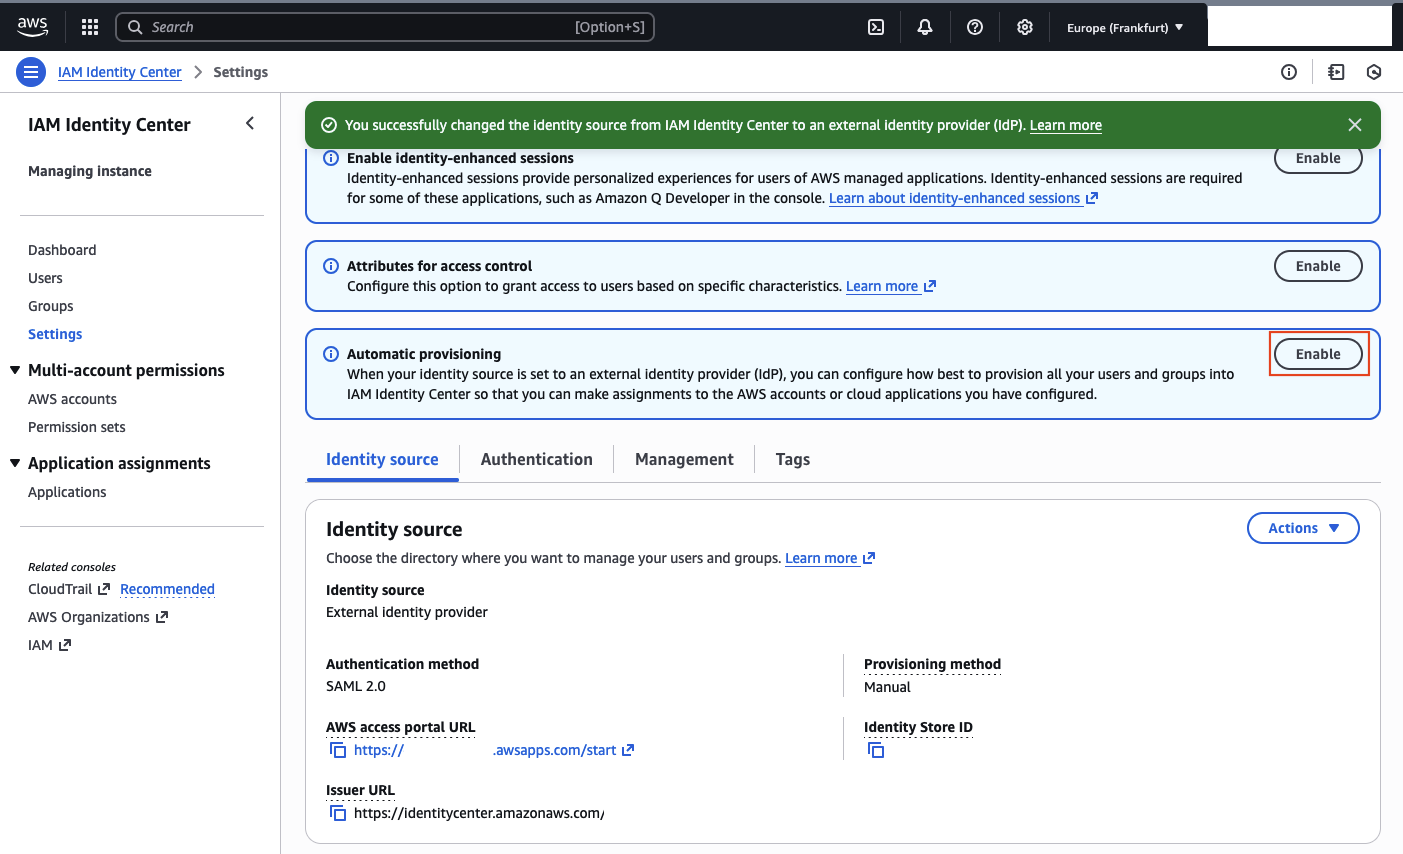
With SSO configured, the next step is to enable automated user and group synchronization using SCIM. In AWS IAM Identity Center, click Enable next to the Automatic provisioning banner.
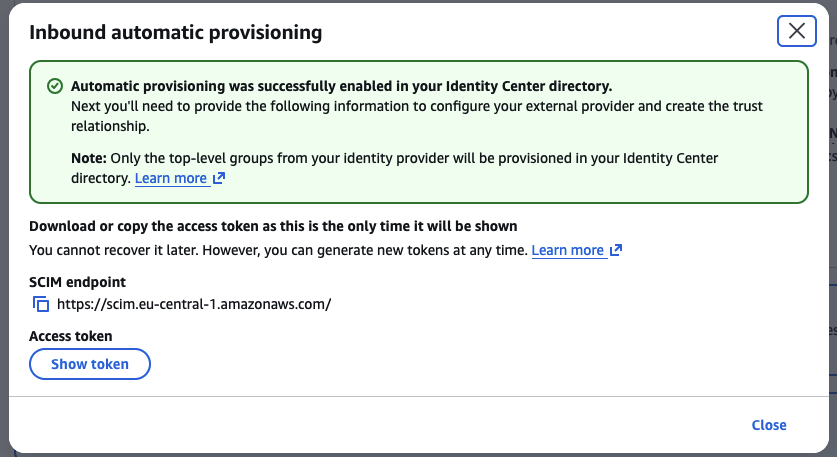
A window titled Inbound automatic provisioning will appear. Copy both the SCIM endpoint and Access token.
Warning
The Access token is displayed only once. Record it securely.
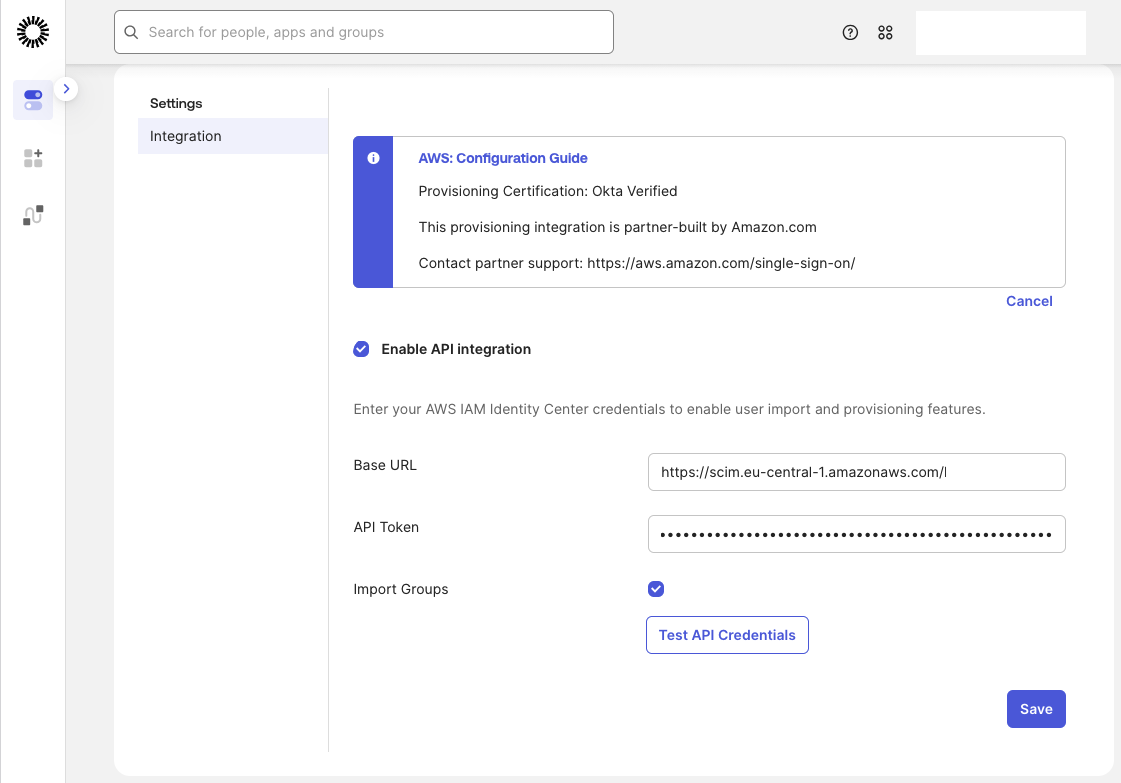
Return to Okta and open the AWS IAM Identity Center application. Select the Provisioning tab, click on Configure API Integration, and enter the following:
- Base URL → the SCIM endpoint
- API Token → the Access token
Click Save.
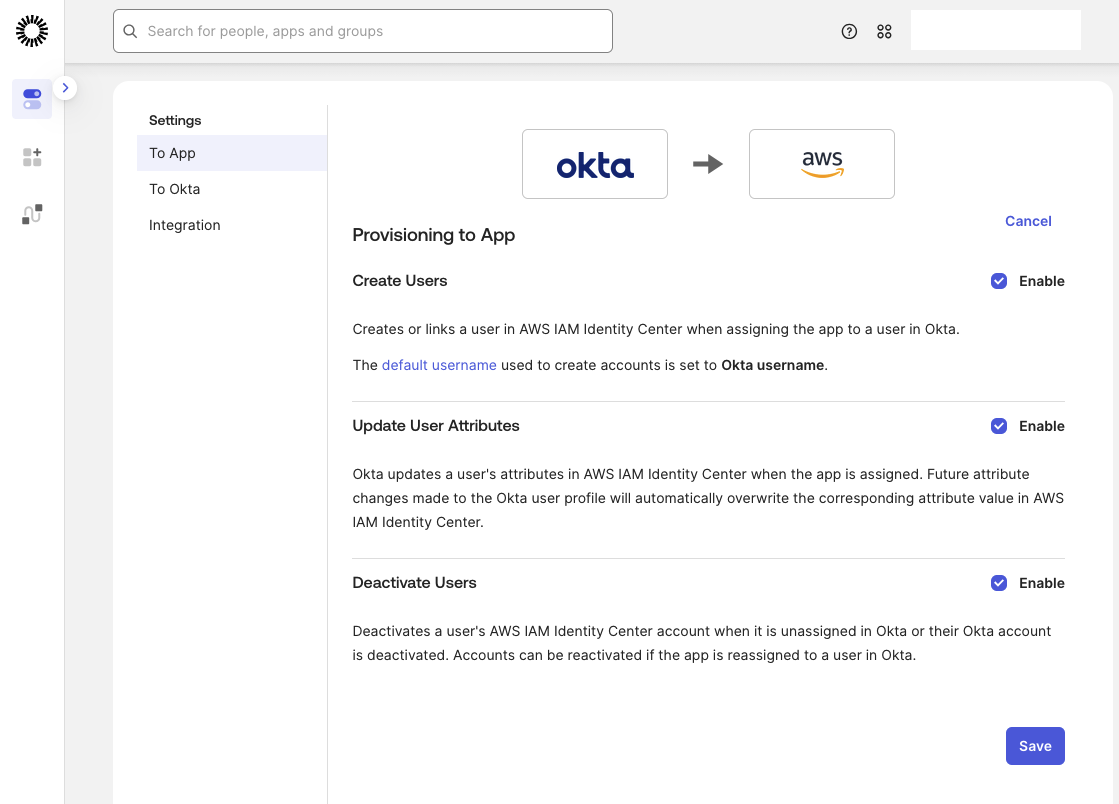
Next, configure the To App provisioning settings. These settings define how users and groups are synchronized from Okta to AWS. Enable Create Users, Update User Attributes, and Deactivate to ensure full lifecycle management for identities provisioned into AWS IAM Identity Center.
Create Groups and Users
In this step, we will create a user and a group in Okta, assign the user to the group, assign the group to the AWS IAM Identity Center application, and trigger provisioning into AWS.
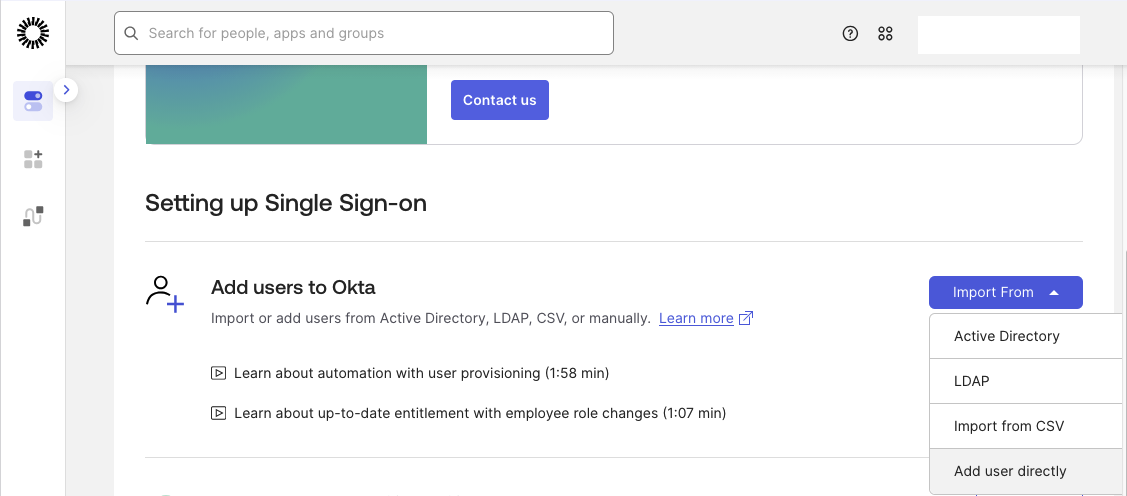
Start by opening the Okta Admin Console. Under Add users to Okta, click Import From and select Add user directly.
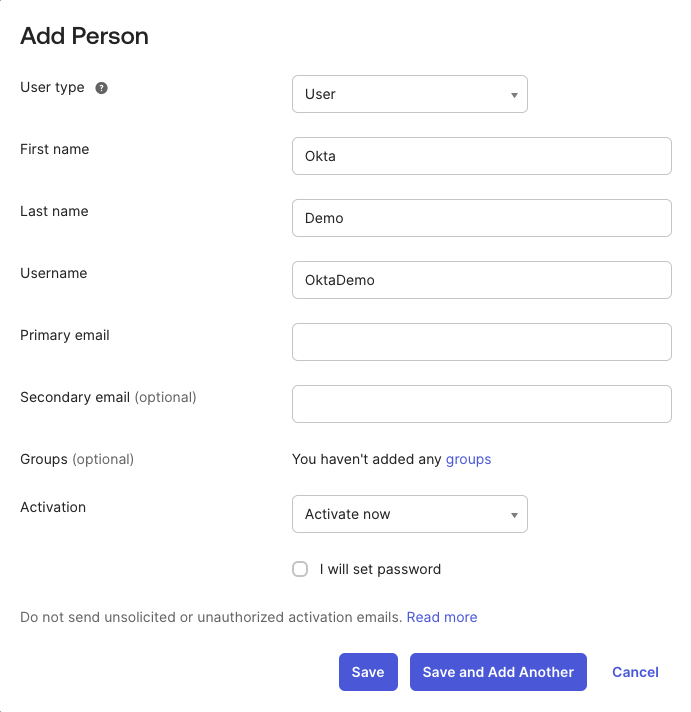
Create a new user named Okta Demo, then click Save to complete the user creation.
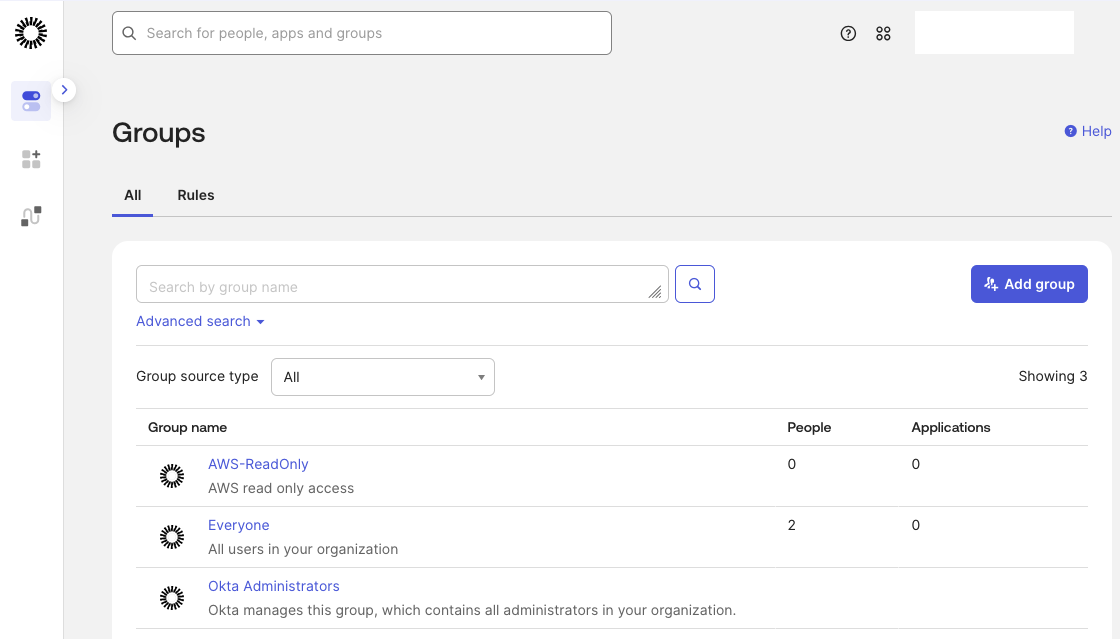
Next, navigate to group management. In the Admin Console, open the Directory menu on the left-hand side and select Groups. In the groups view, click Add group to create a new Okta group and name it AWS-ReadOnly.
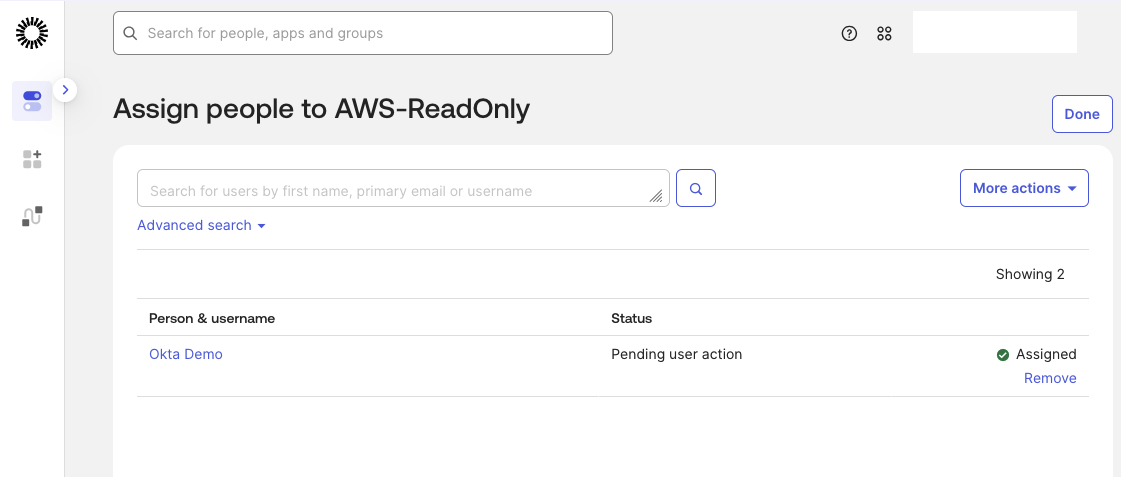
Assign the user OktaDemo to the newly created AWS-ReadOnly group.
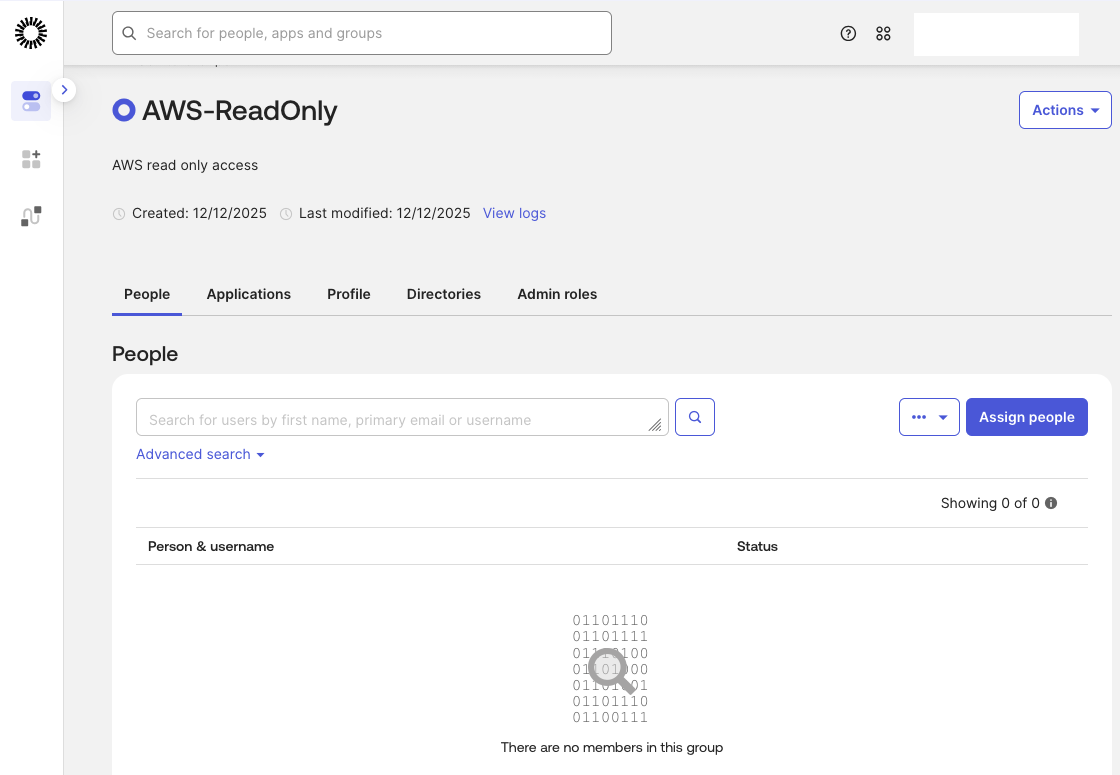
Verify that the user is now a member of the group.
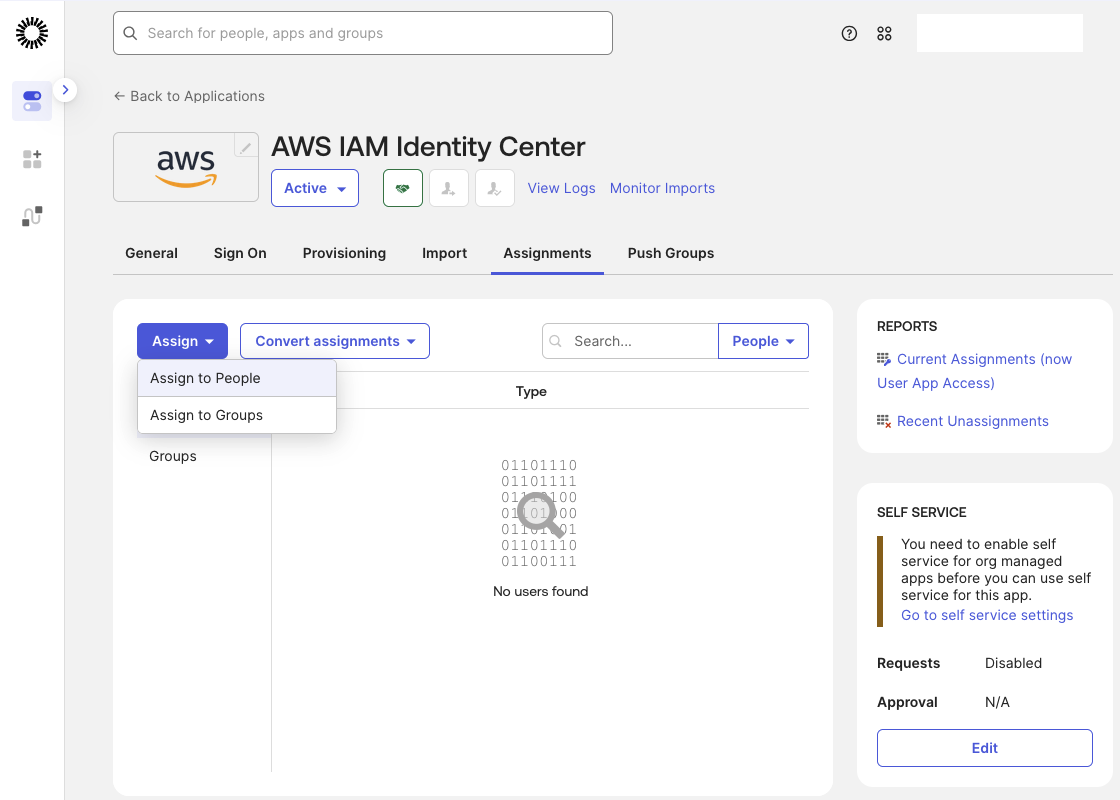
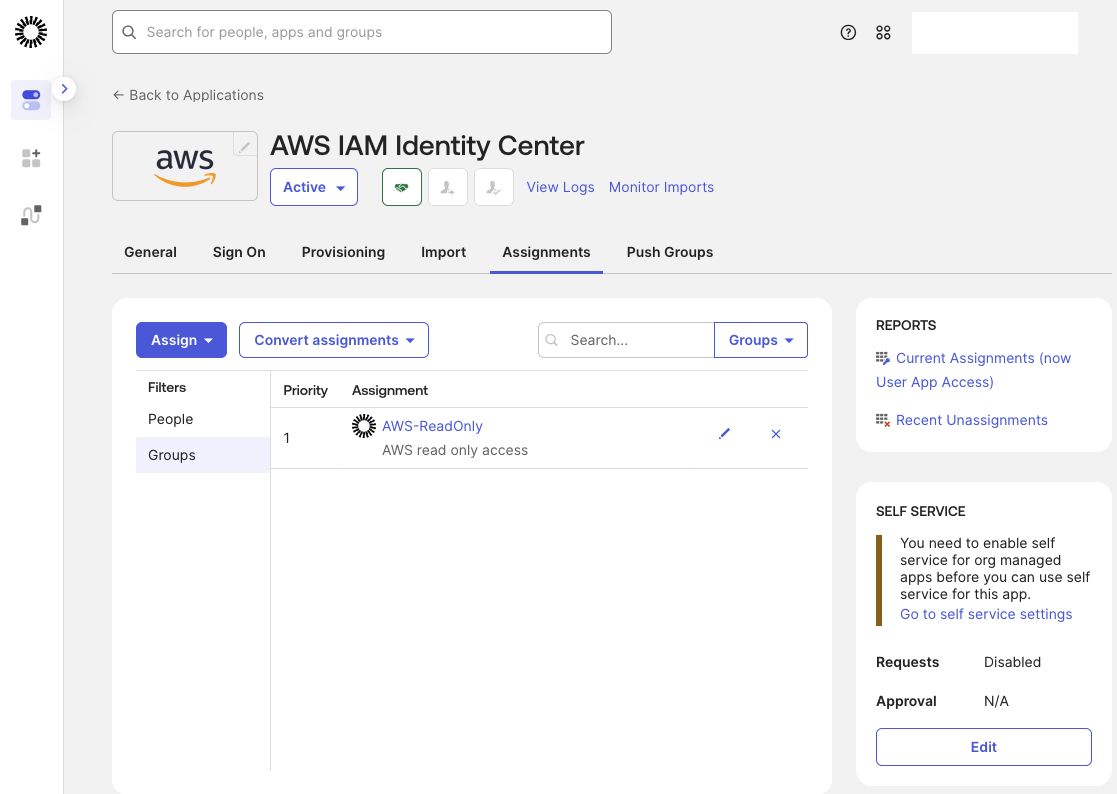
Next, return to the Okta AWS IAM Identity Center application and open the Assignments tab. Click Assign and select Assign to Groups, then choose the AWS-ReadOnly group.
The AWS-ReadOnly group is now assigned to the AWS IAM Identity Center application.
To synchronize identities to AWS, open the Push Groups tab and click Push Groups. Select the AWS-ReadOnly group to begin provisioning.
The Push Status will change to Pushing. Once the status updates to Active, the users and groups have been successfully synchronized with AWS IAM Identity Center.

Assign Permissions
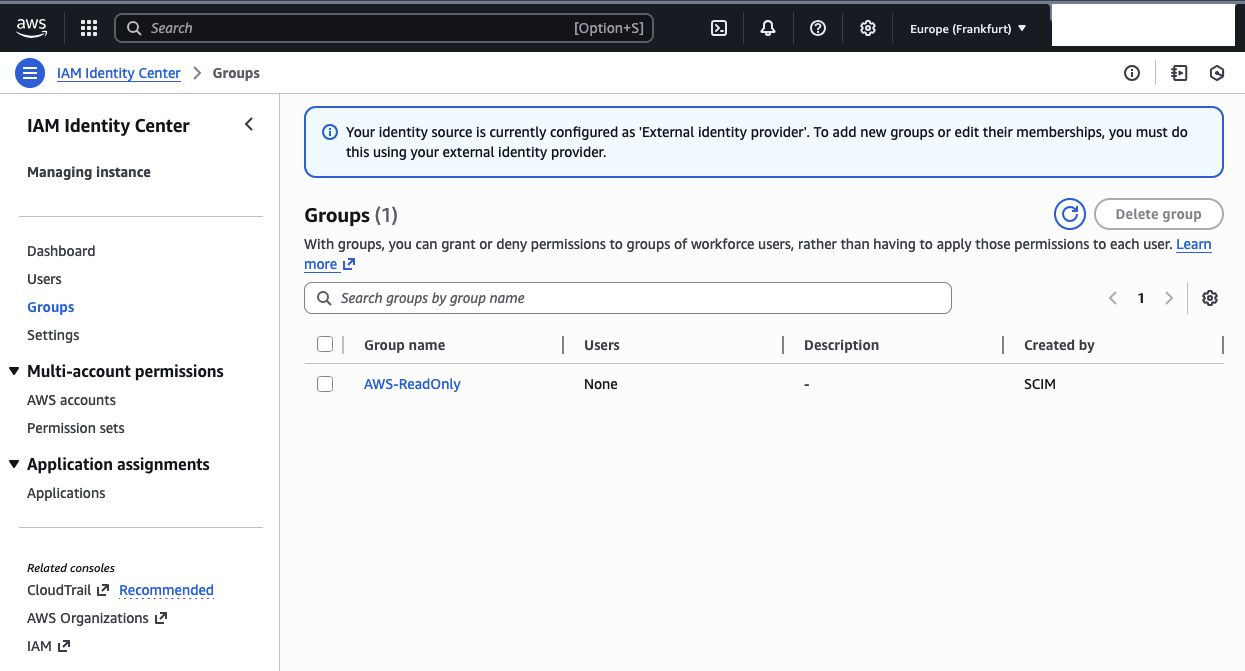
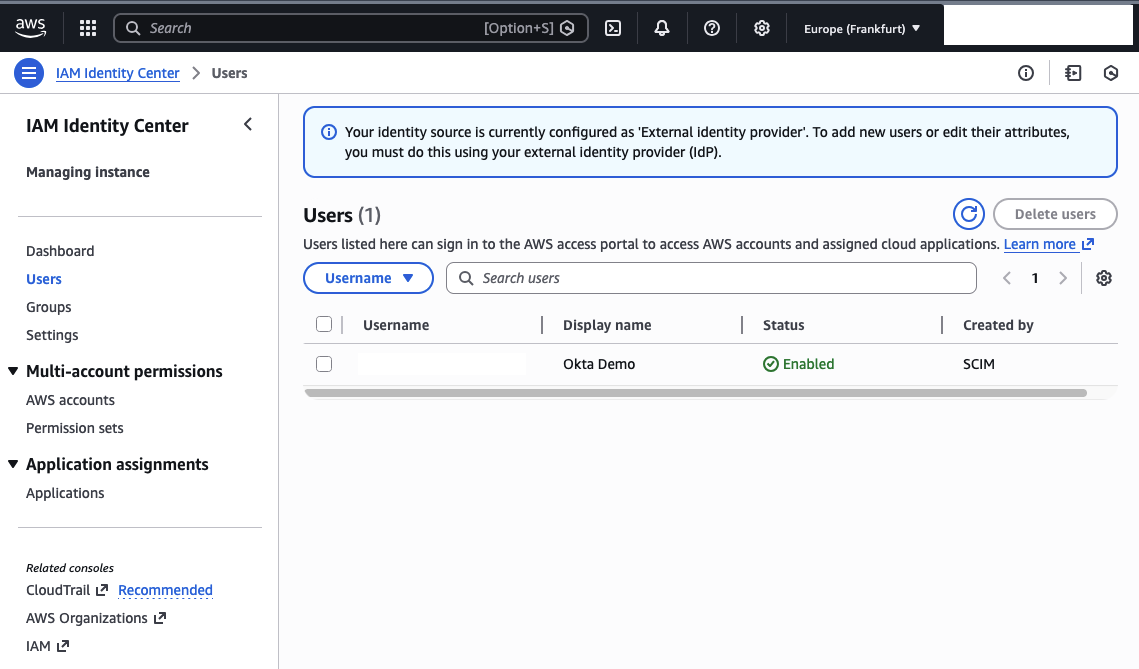
After SCIM provisioning completes, the AWS-ReadOnly group and the user Okta Demo will appear in AWS IAM Identity Center.
You should also see the user Okta Demo appear in the AWS IAM Identity Center Console.
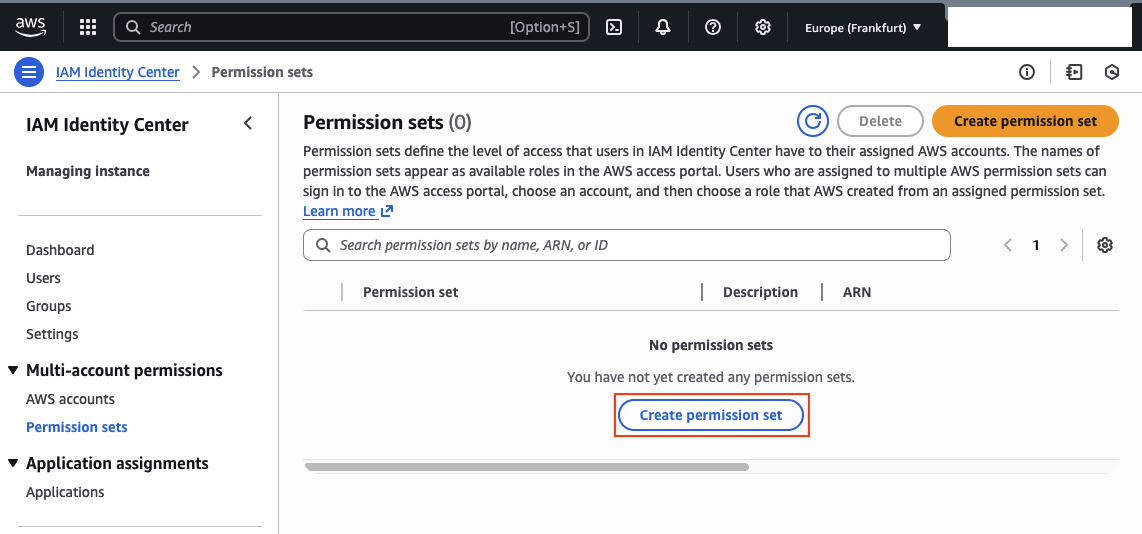
To grant AWS access, create a permission set. In IAM Identity Center, open Permission sets and click Create permission set. Select the AWS-managed permission set ReadOnlyAccess and finalize creation.
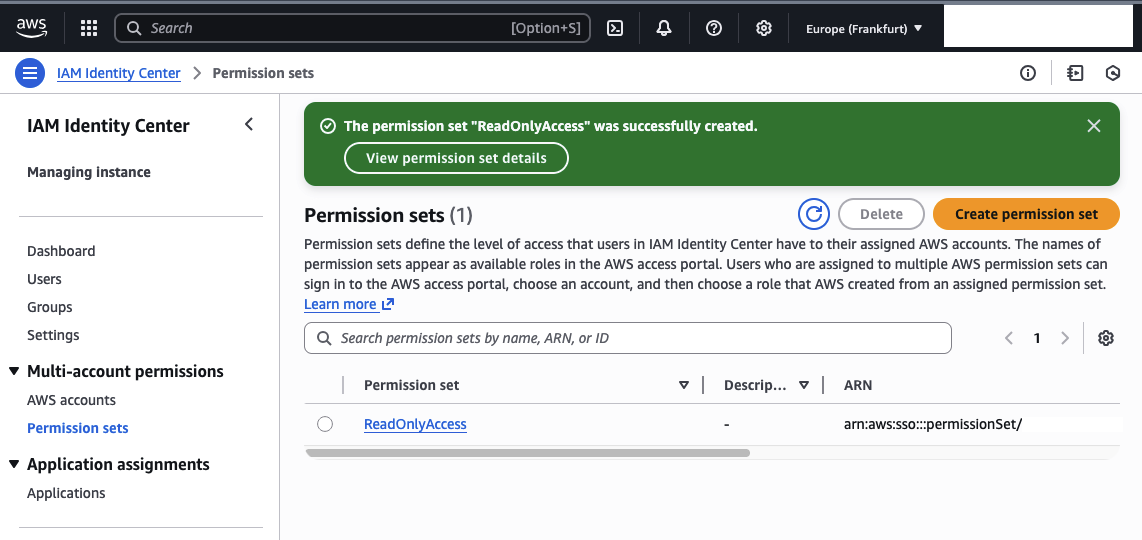
You should now see a new ReadOnlyAccess permission set in the list.
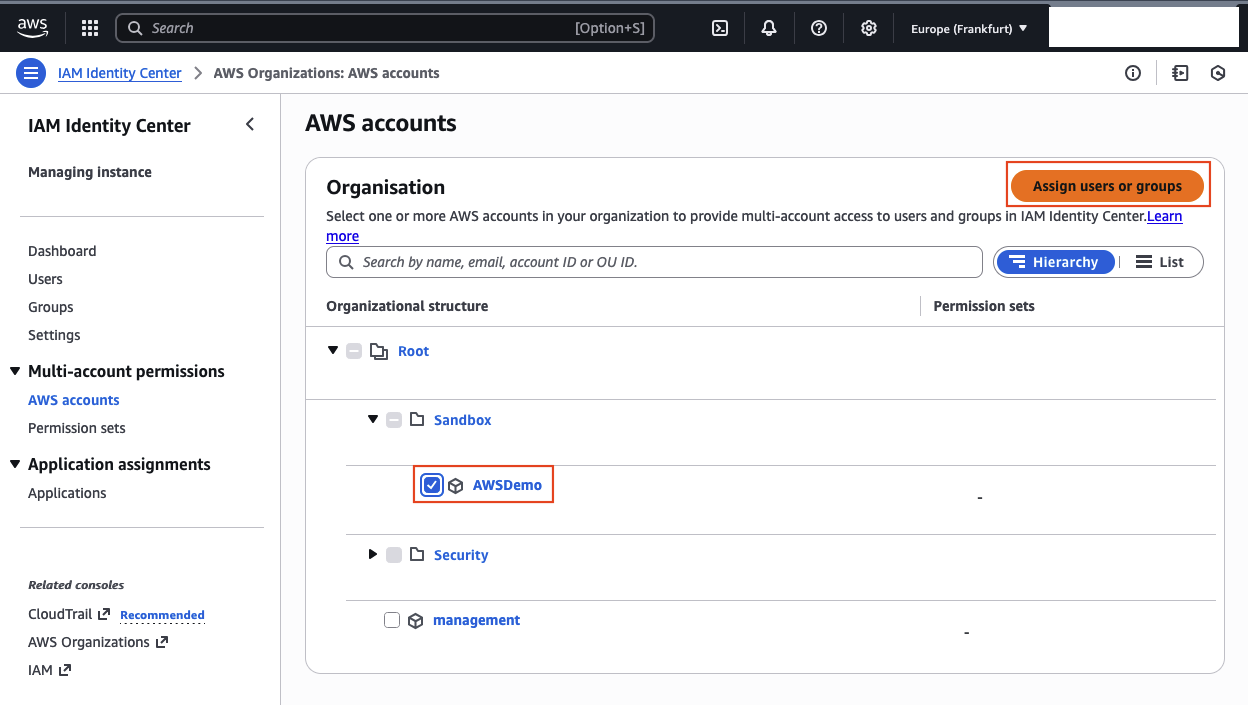
Next, assign this permission set to an AWS account. Go to AWS accounts, select the target account (for example AWSDemo), and click Assign users or groups.
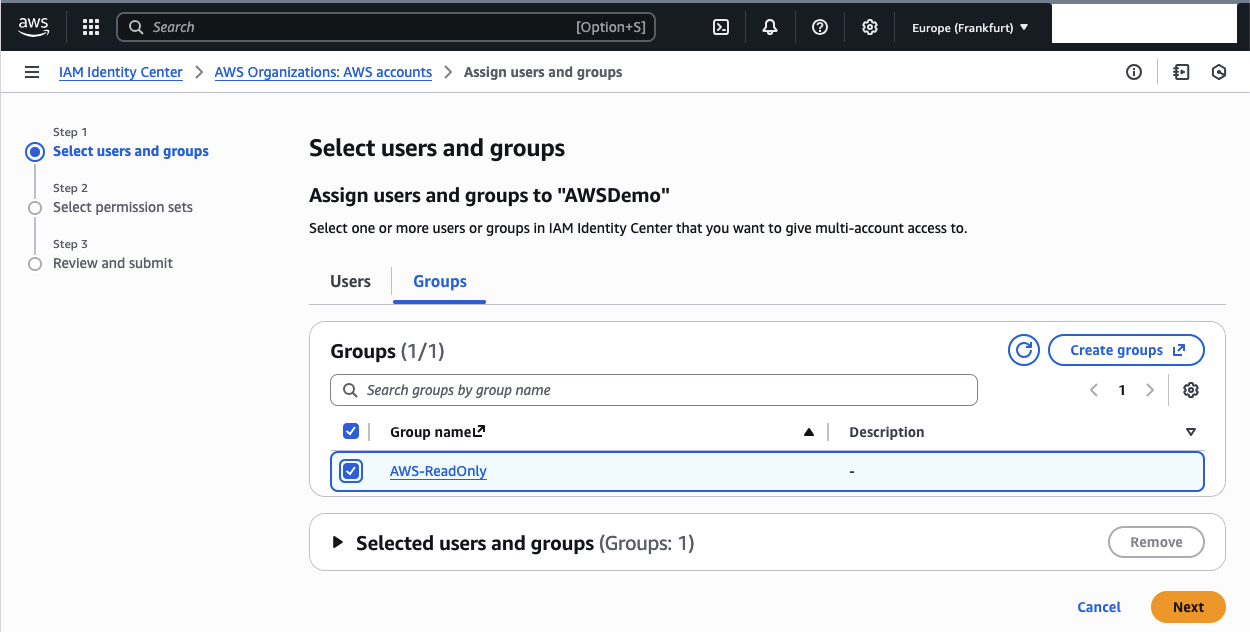
A new window will open up. Select the AWS-ReadOnly group and click Next.
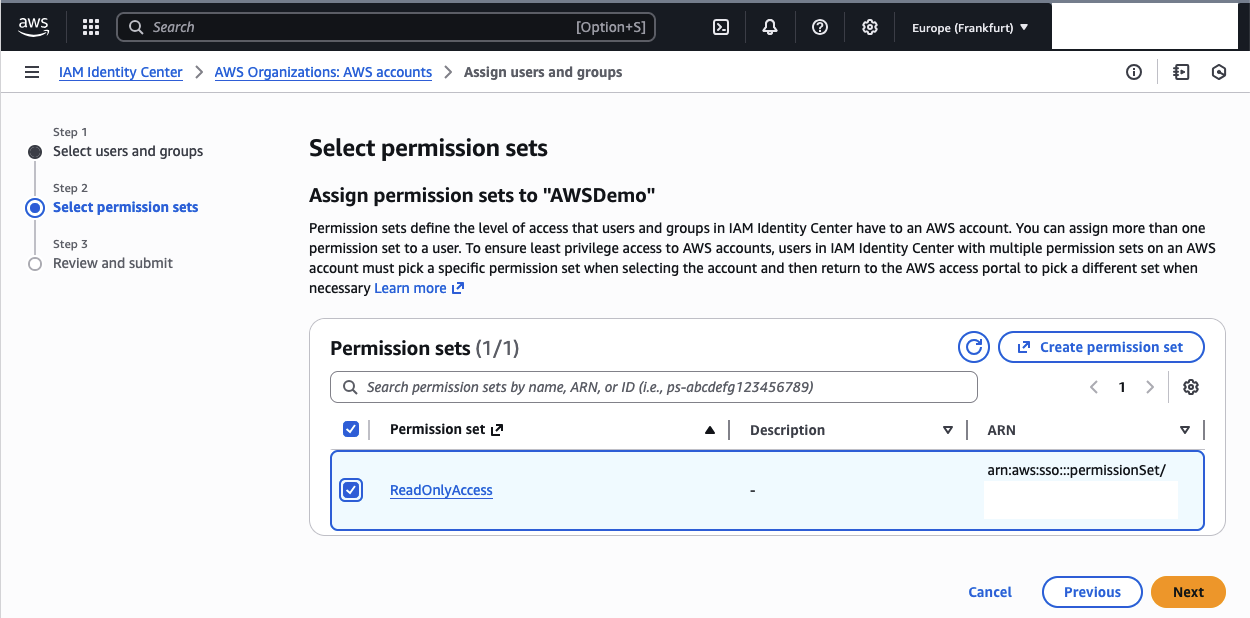
Next, select the ReadOnlyAccess permission set and click Next to review.
Members of the AWS-ReadOnly group now have read-only access to the AWSDemo account.
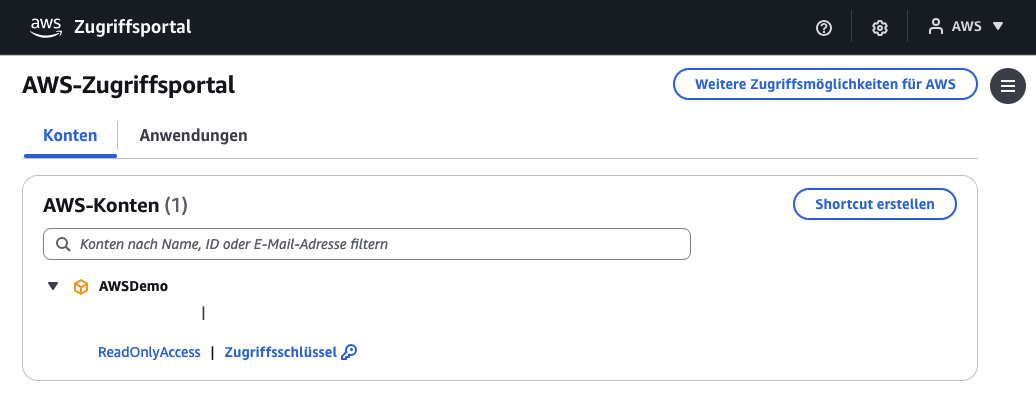
To test the setup, log in with the Okta Demo user in Okta and open the Application Console. You should see the AWS IAM Identity Center application. Clicking it should redirect you to AWS IAM Identity Center.

The user will see the AWSDemo account with the ReadOnlyAccess permission set assigned.
Summary
Congratulations! You’ve successfully configured SSO with SAML and enabled automatic identity synchronization using SCIM. With this setup, you can fully leverage centralized identity management in Okta, streamline your Identity and Access Management processes, and strengthen the overall security posture of your environment.
I hope this walkthrough was helpful and that you picked up something new along the way. I’d love to hear your feedback and am happy to answer any questions you may have.
— Hendrik